Introduction & Use Case:
🎃 This post is all about getting our creative juices flowing with a DIY Halloween project. 🕸️ Whether you’re looking to craft eerie decorations or design the ultimate costume, we’re gonna take it to the next level… Let’s dive in and make this Halloween the best yet! 👻

What are we building?
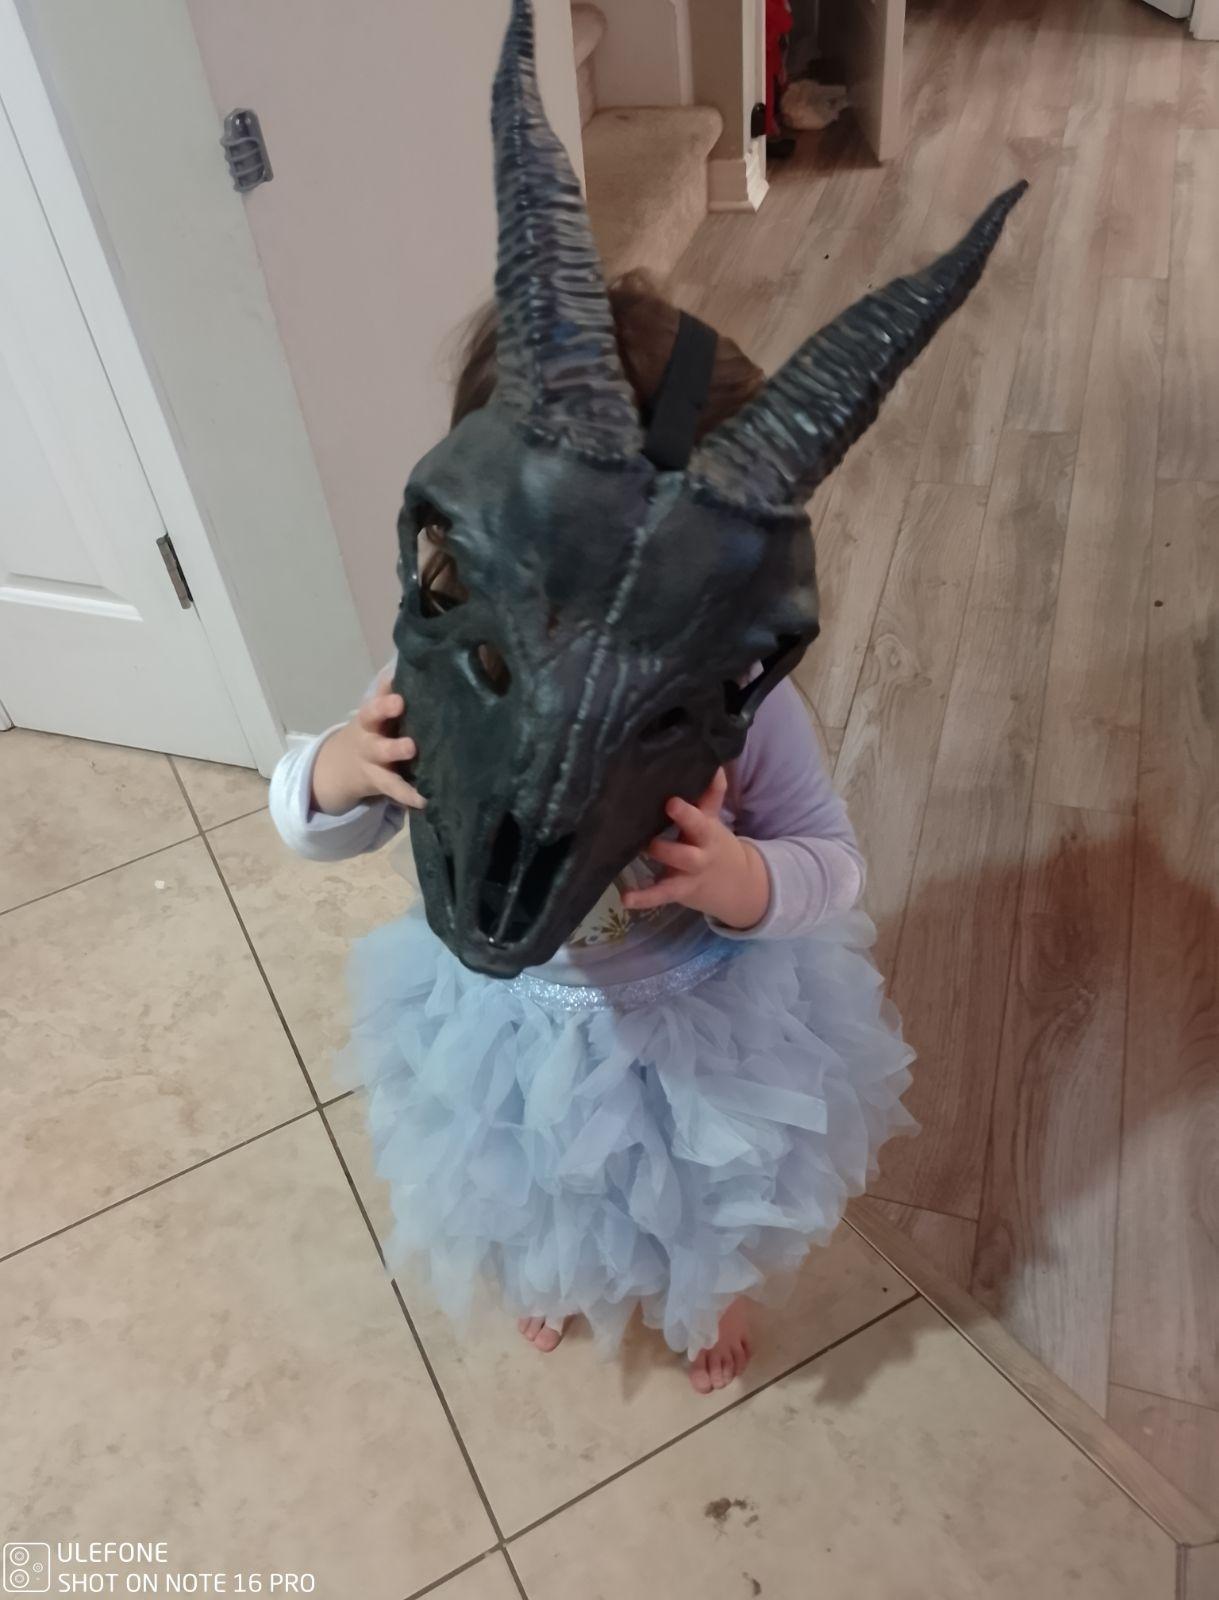
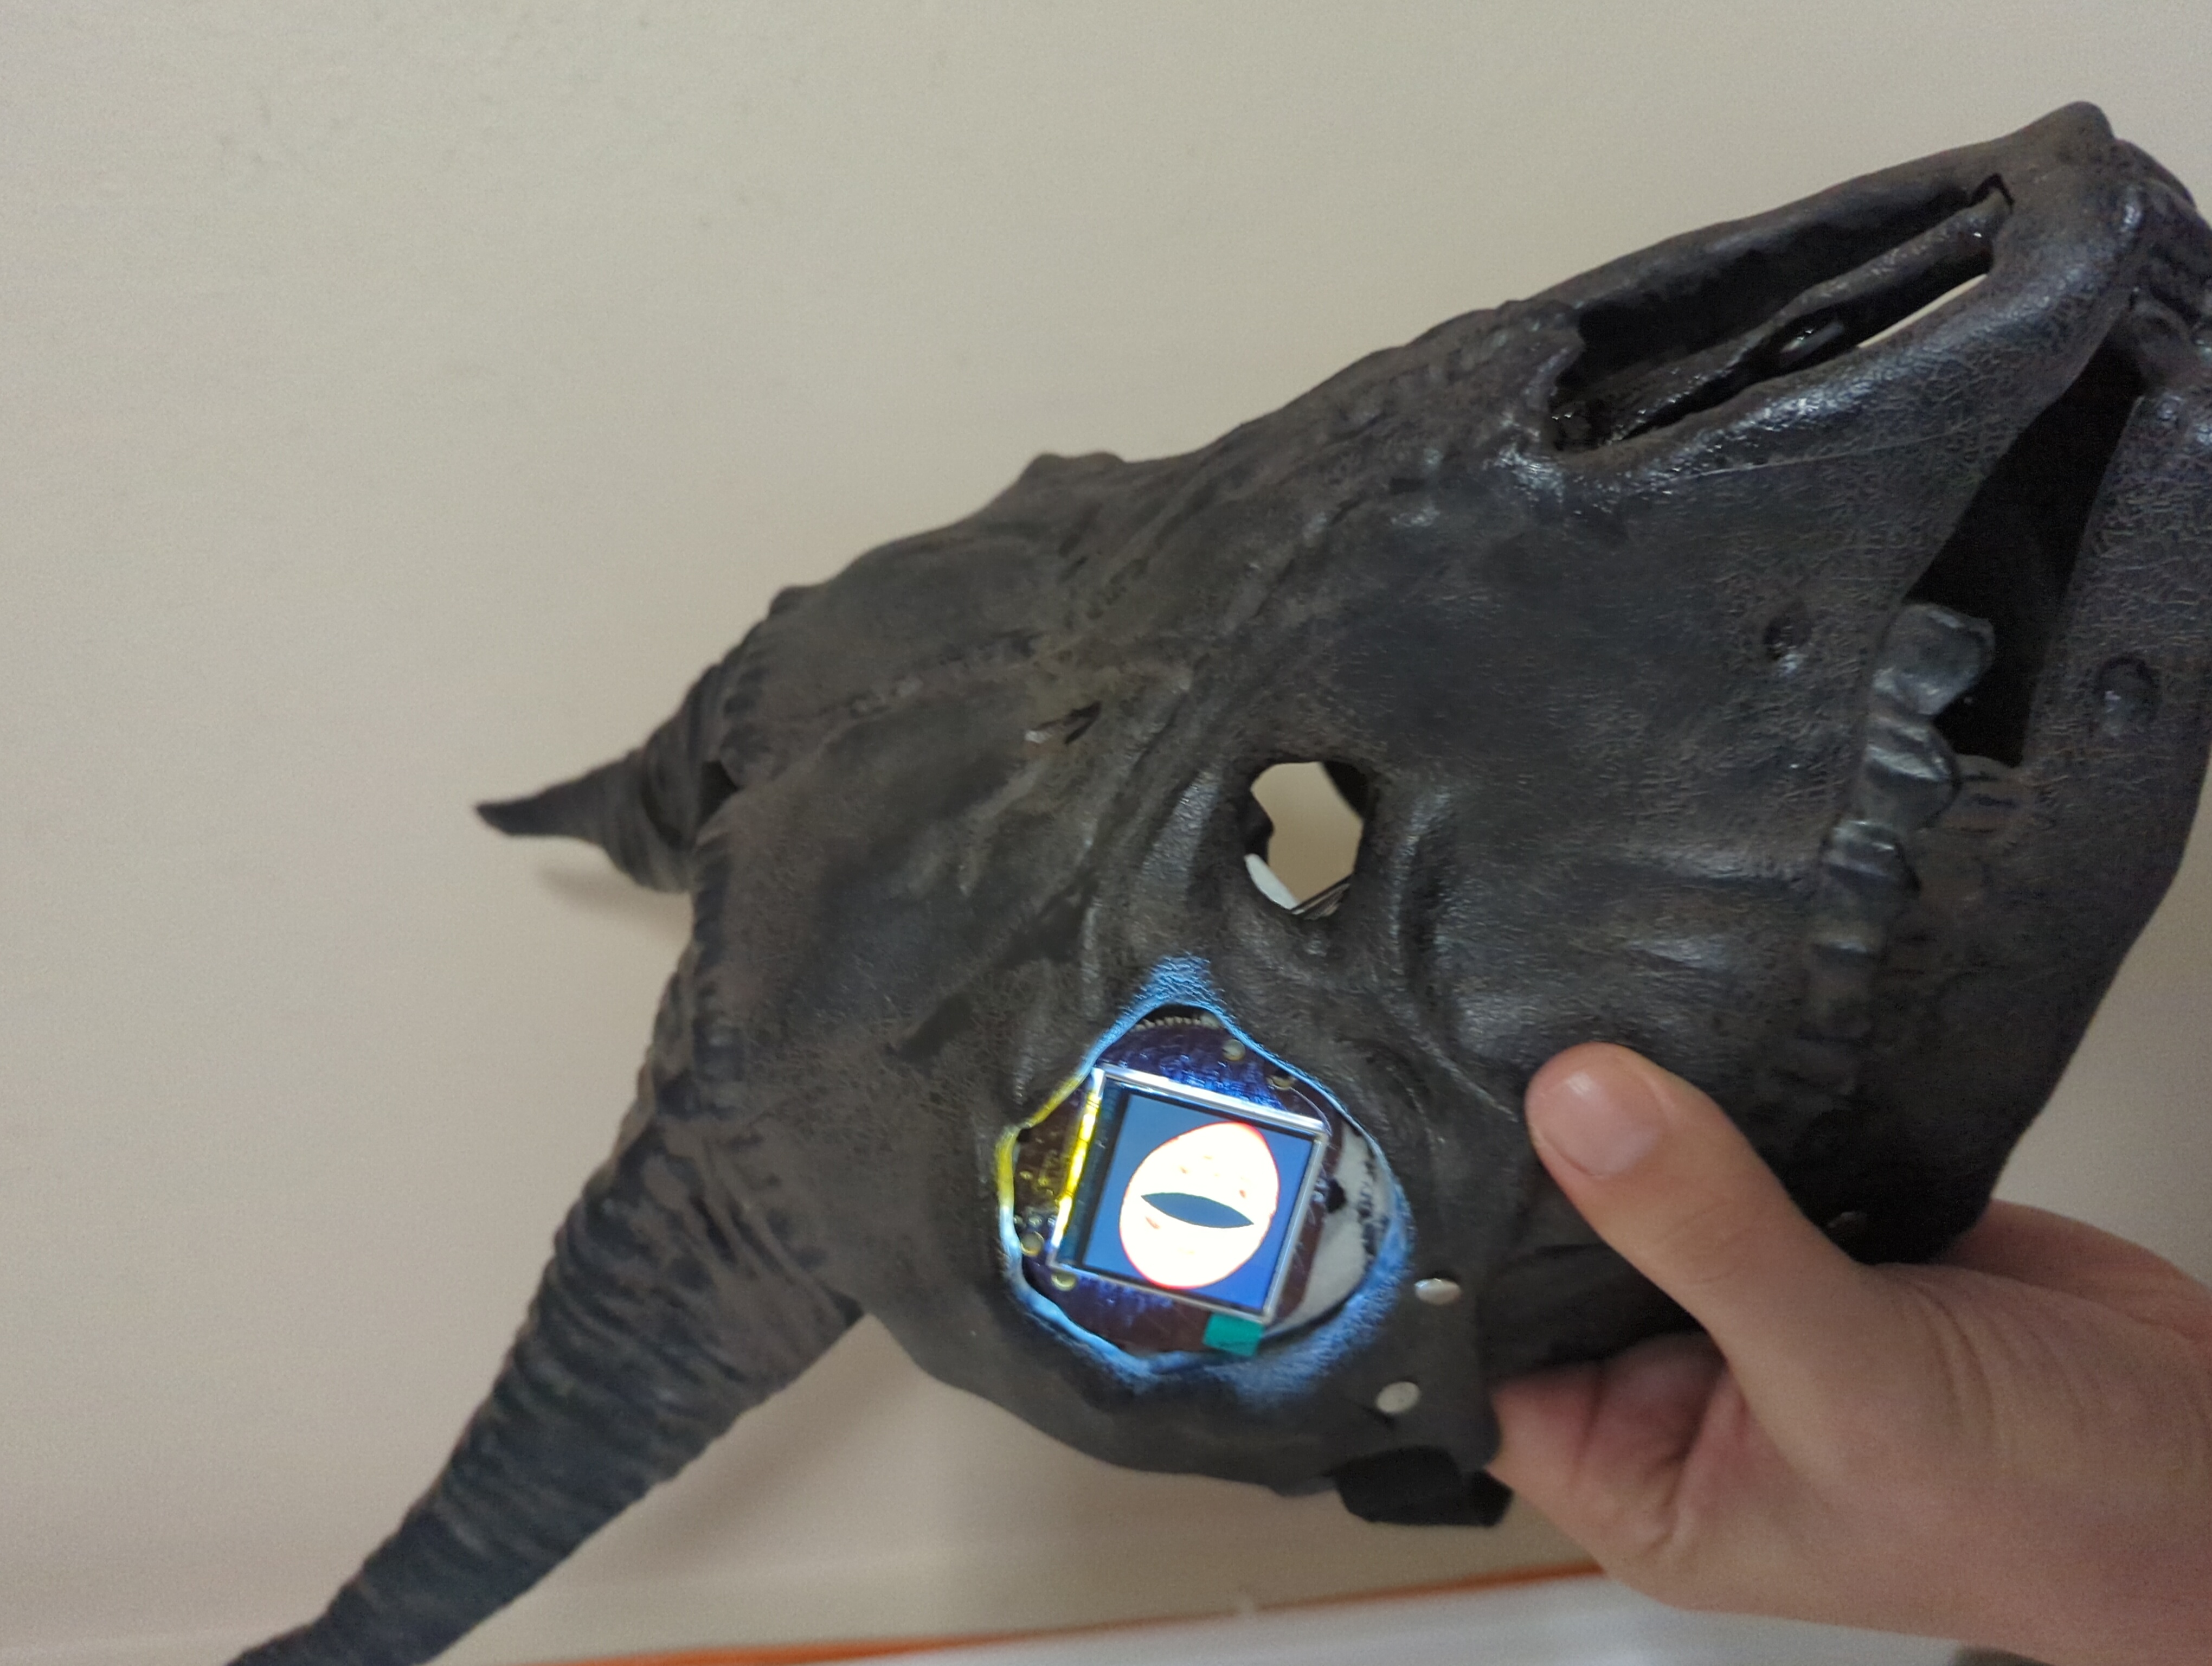
My daughter picked out a sweet halloween mask and I thought to myself… how can we elevate this?
I’ve worked on a pair of Raspberry Pi powered ‘eyeballs’ in the past (great to stick inside a carved out pumpkin) and thought they would be cool in a mask.
The pair of eyes I’ve previously setup were too bulky to fit inside a mask, so I bought a slimmed down Adafruit Monster M4SK (board build in, less bulky) and a cheap Lithium Ion Cylindrical Battery (3.7v, 2200mAh). The results are awesome. Let’s dig in…
This post will be broken up into two parts starting with the basic Raspberry pi build, then the final Monster M4SK build.
In this Post We Will:
Part 1:
- 💾 Perform a Headless Raspberry Pi Setup (BullseyeOS).
- 🔌 Connect Hardware & Deploy Software Eyes.
- 👀 Customize Eye Shape, Colour, Iris, Sclera, etc.
- 🎃 Light up a Pumpkin!
Part 2:
- 🔩 Customize our Monster M4SK.
- 🔧 Extend the Distance Between Displays.
- 👻 Spook the Neighbour’s Kids!
Hardware Pre-Requisites
For a bulkier build suitable for inside a carved pumpkin, I used the following:
- Animated Eyes Bonnet for Raspberry Pi
- PiSugar S Plus Portable 5000 mAh UPS Lithium Battery Power Module
- Raspberry Pi 4 Model B
For the final, slimmer Mask build, I used the following:
- Lithium Ion Cylindrical Battery - 3.7v 2200mAh
- JST SH 9-Pin Cable - 100mm long x 2
- Adafruit MONSTER M4SK - DIY Electronic Eyes Mask
- Some Duct Tape or Electrical Tape
- Some Styrofoam
- Soldering Iron
- Heat Shrink Tubing (small)
Part 1 - Raspberry Pi Snake Eyes Bonnet
⛔ NOTE: –> The Animated Eyes Bonnet for Raspberry Pi is not compatible with BookwormOS so we have to use the older BullseyeOS.
💡 Developer’s Notes:
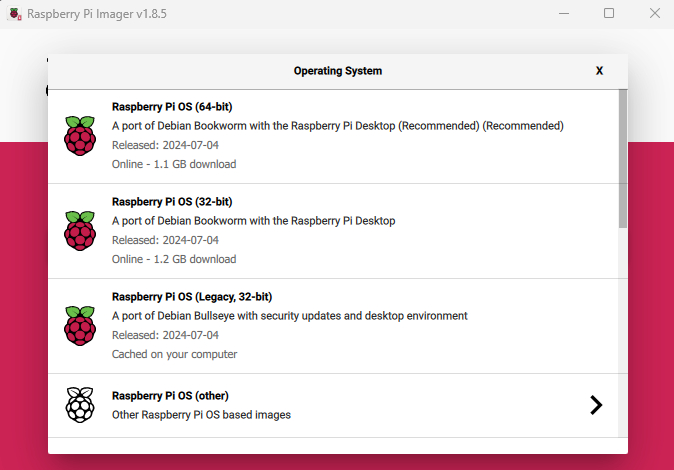
- All Raspberry Pi boards: Raspberry Pi Bullseye OS Lite (Legacy) software is required. Look for both Lite and Legacy in the name!
- For all boards: use the 32-bit version of the operating system, not the 64-bit variant.
Perform a Headless Raspberry Pi Setup (BullseyeOS)
1. Grab the OS image from the official Raspberry Pi site (don’t extract, leave it as is).
2. Insert your SD card into the reader and run the Raspberry Pi Imager (available here).
![]()
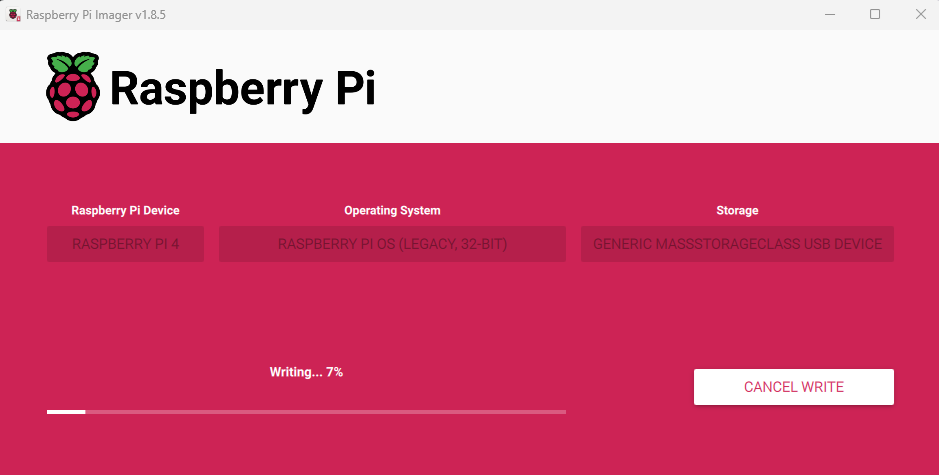
3. Select your hardware, desired OS, and destination storage (SD Card) as illustrated below…
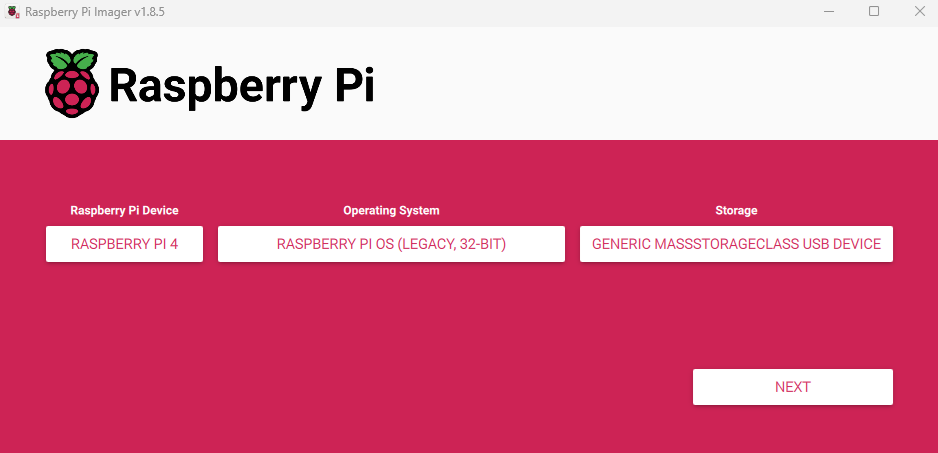
💡 IMPORTANT –> Make sure you grab the legacy 32bit Bullseye OS; as this software is not supported as-is on the latest Bookworm OS
4. Select Next and you will be prompted with the option to edit OS settings. Select Edit and enter your network SSID and PSK, as well as your desired username and password.
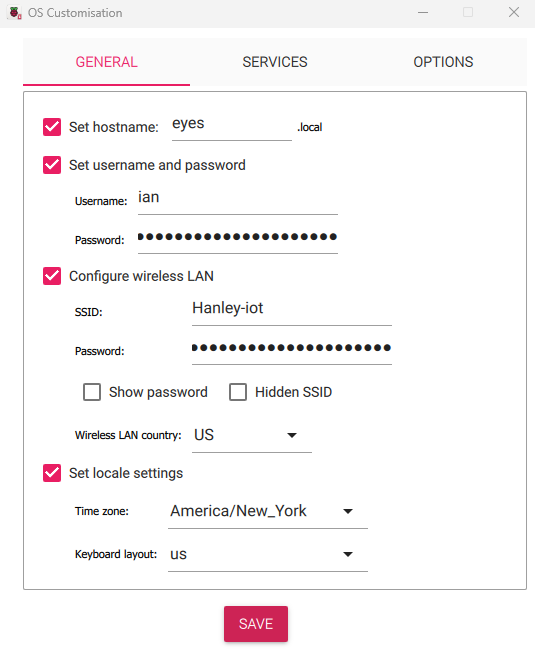
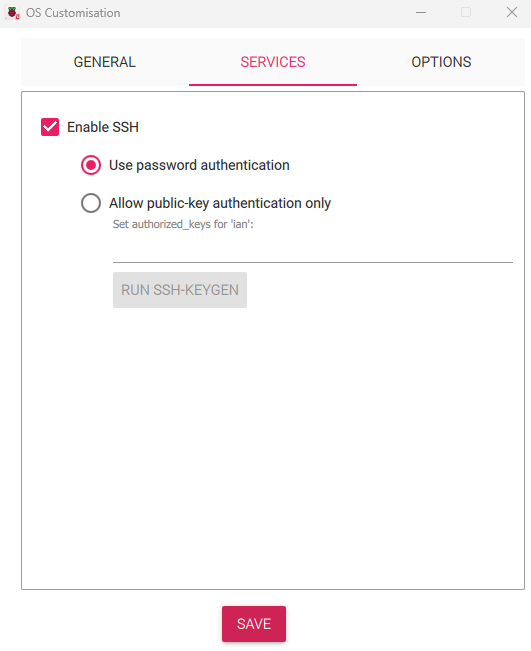
5. Navigate from the General tab over to the SSH tab and make sure it’s enabled with password authentication as shown below…
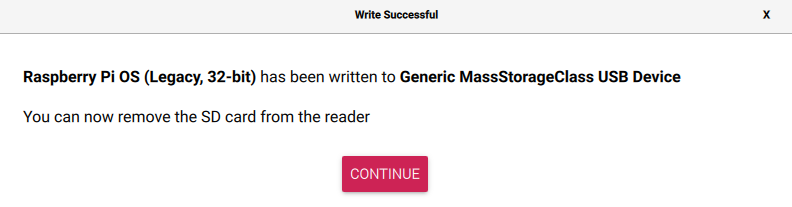
6. Click Next and let it burn! 🔥
7. Drop the SD card into your Raspberry Pi board and boot it up.
8. Locate it on the network (login to your router or use Advanced IP Scanner)
9. Login and do the needful:
sudo apt-get update && sudo apt-get upgrade
Connect Hardware
💡 Developer’s Notes –> The code for this project only works with the Adafruit 128x128 pixel OLED and TFT displays and 240x240 pixel IPS TFT displays.
Any recent Raspberry Pi board with the 40-pin GPIO header should work. The very earliest Pi boards — Model A and B, with the 26-pin GPIO header — are not compatible.
A Raspberry Pi 2 or greater is highly recommended. The code will run on a Pi Zero or other single-core Raspberry Pi boards, but performance lags quite a bit. Pi 4 works now, which was previously incompatible.
Here’s the PIN-OUT: 
It’s important to get this right. I know it seems simple, but the connections have to be 1:1
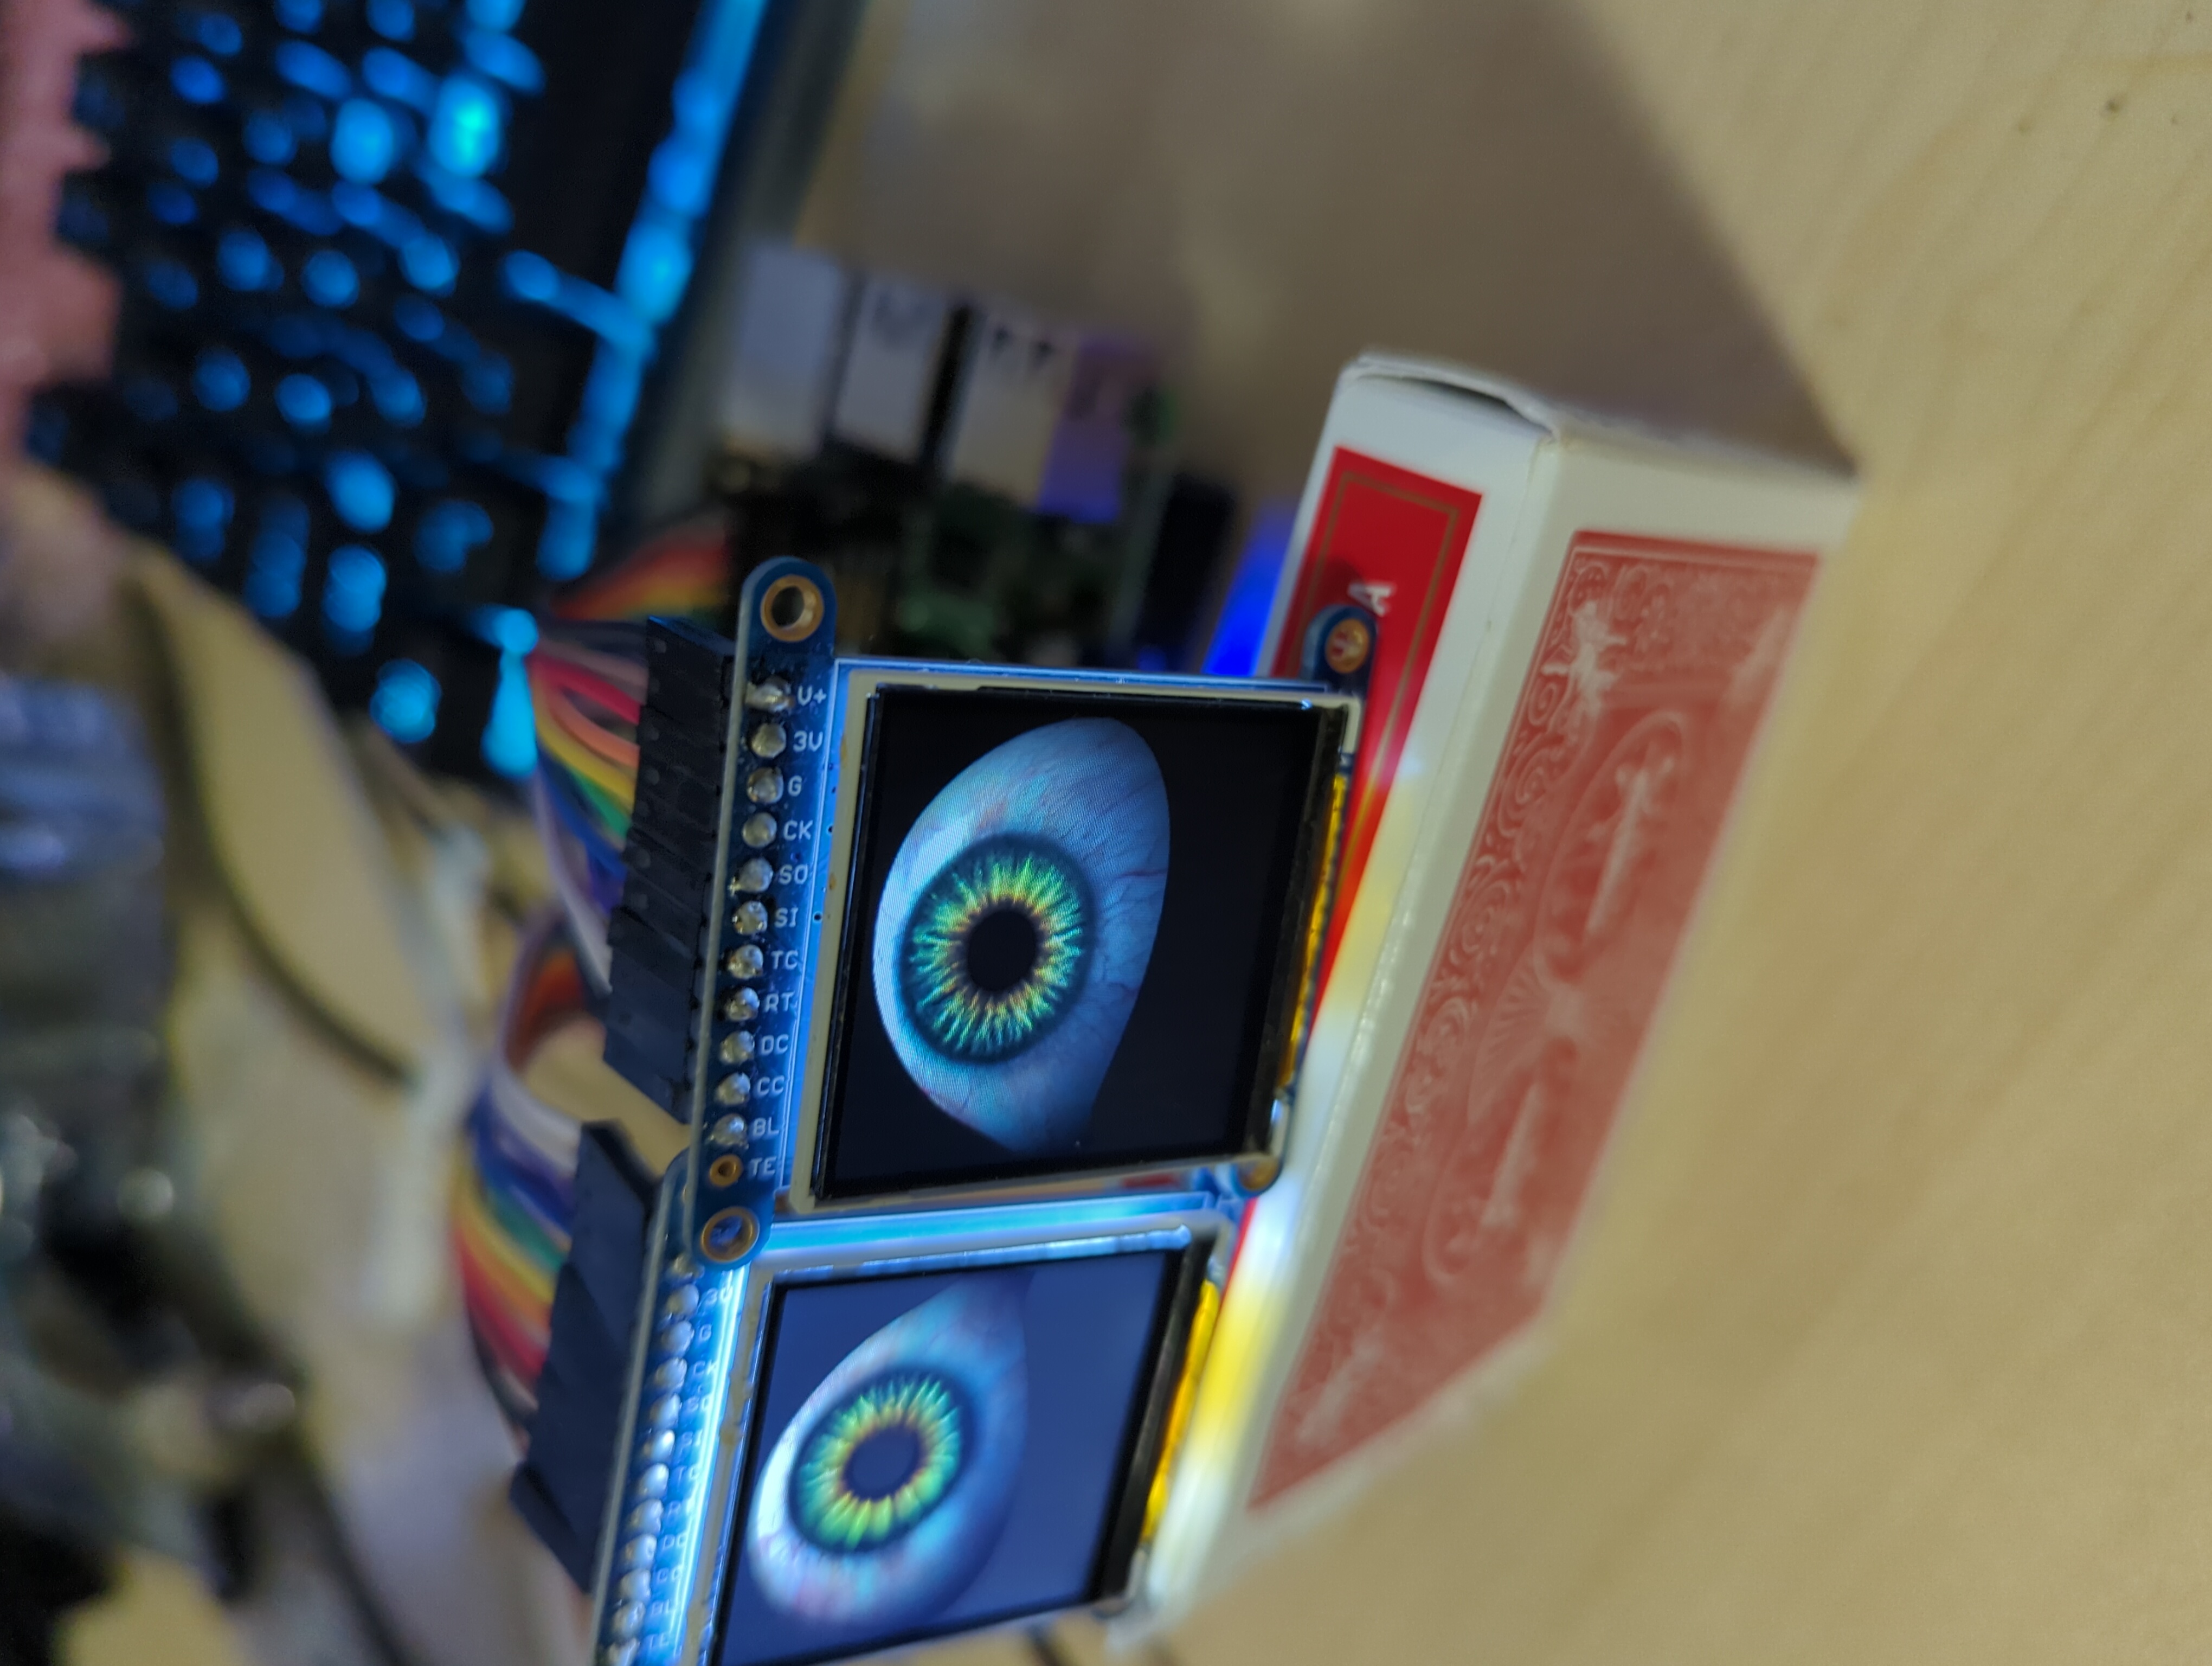
Here’s what not to do:
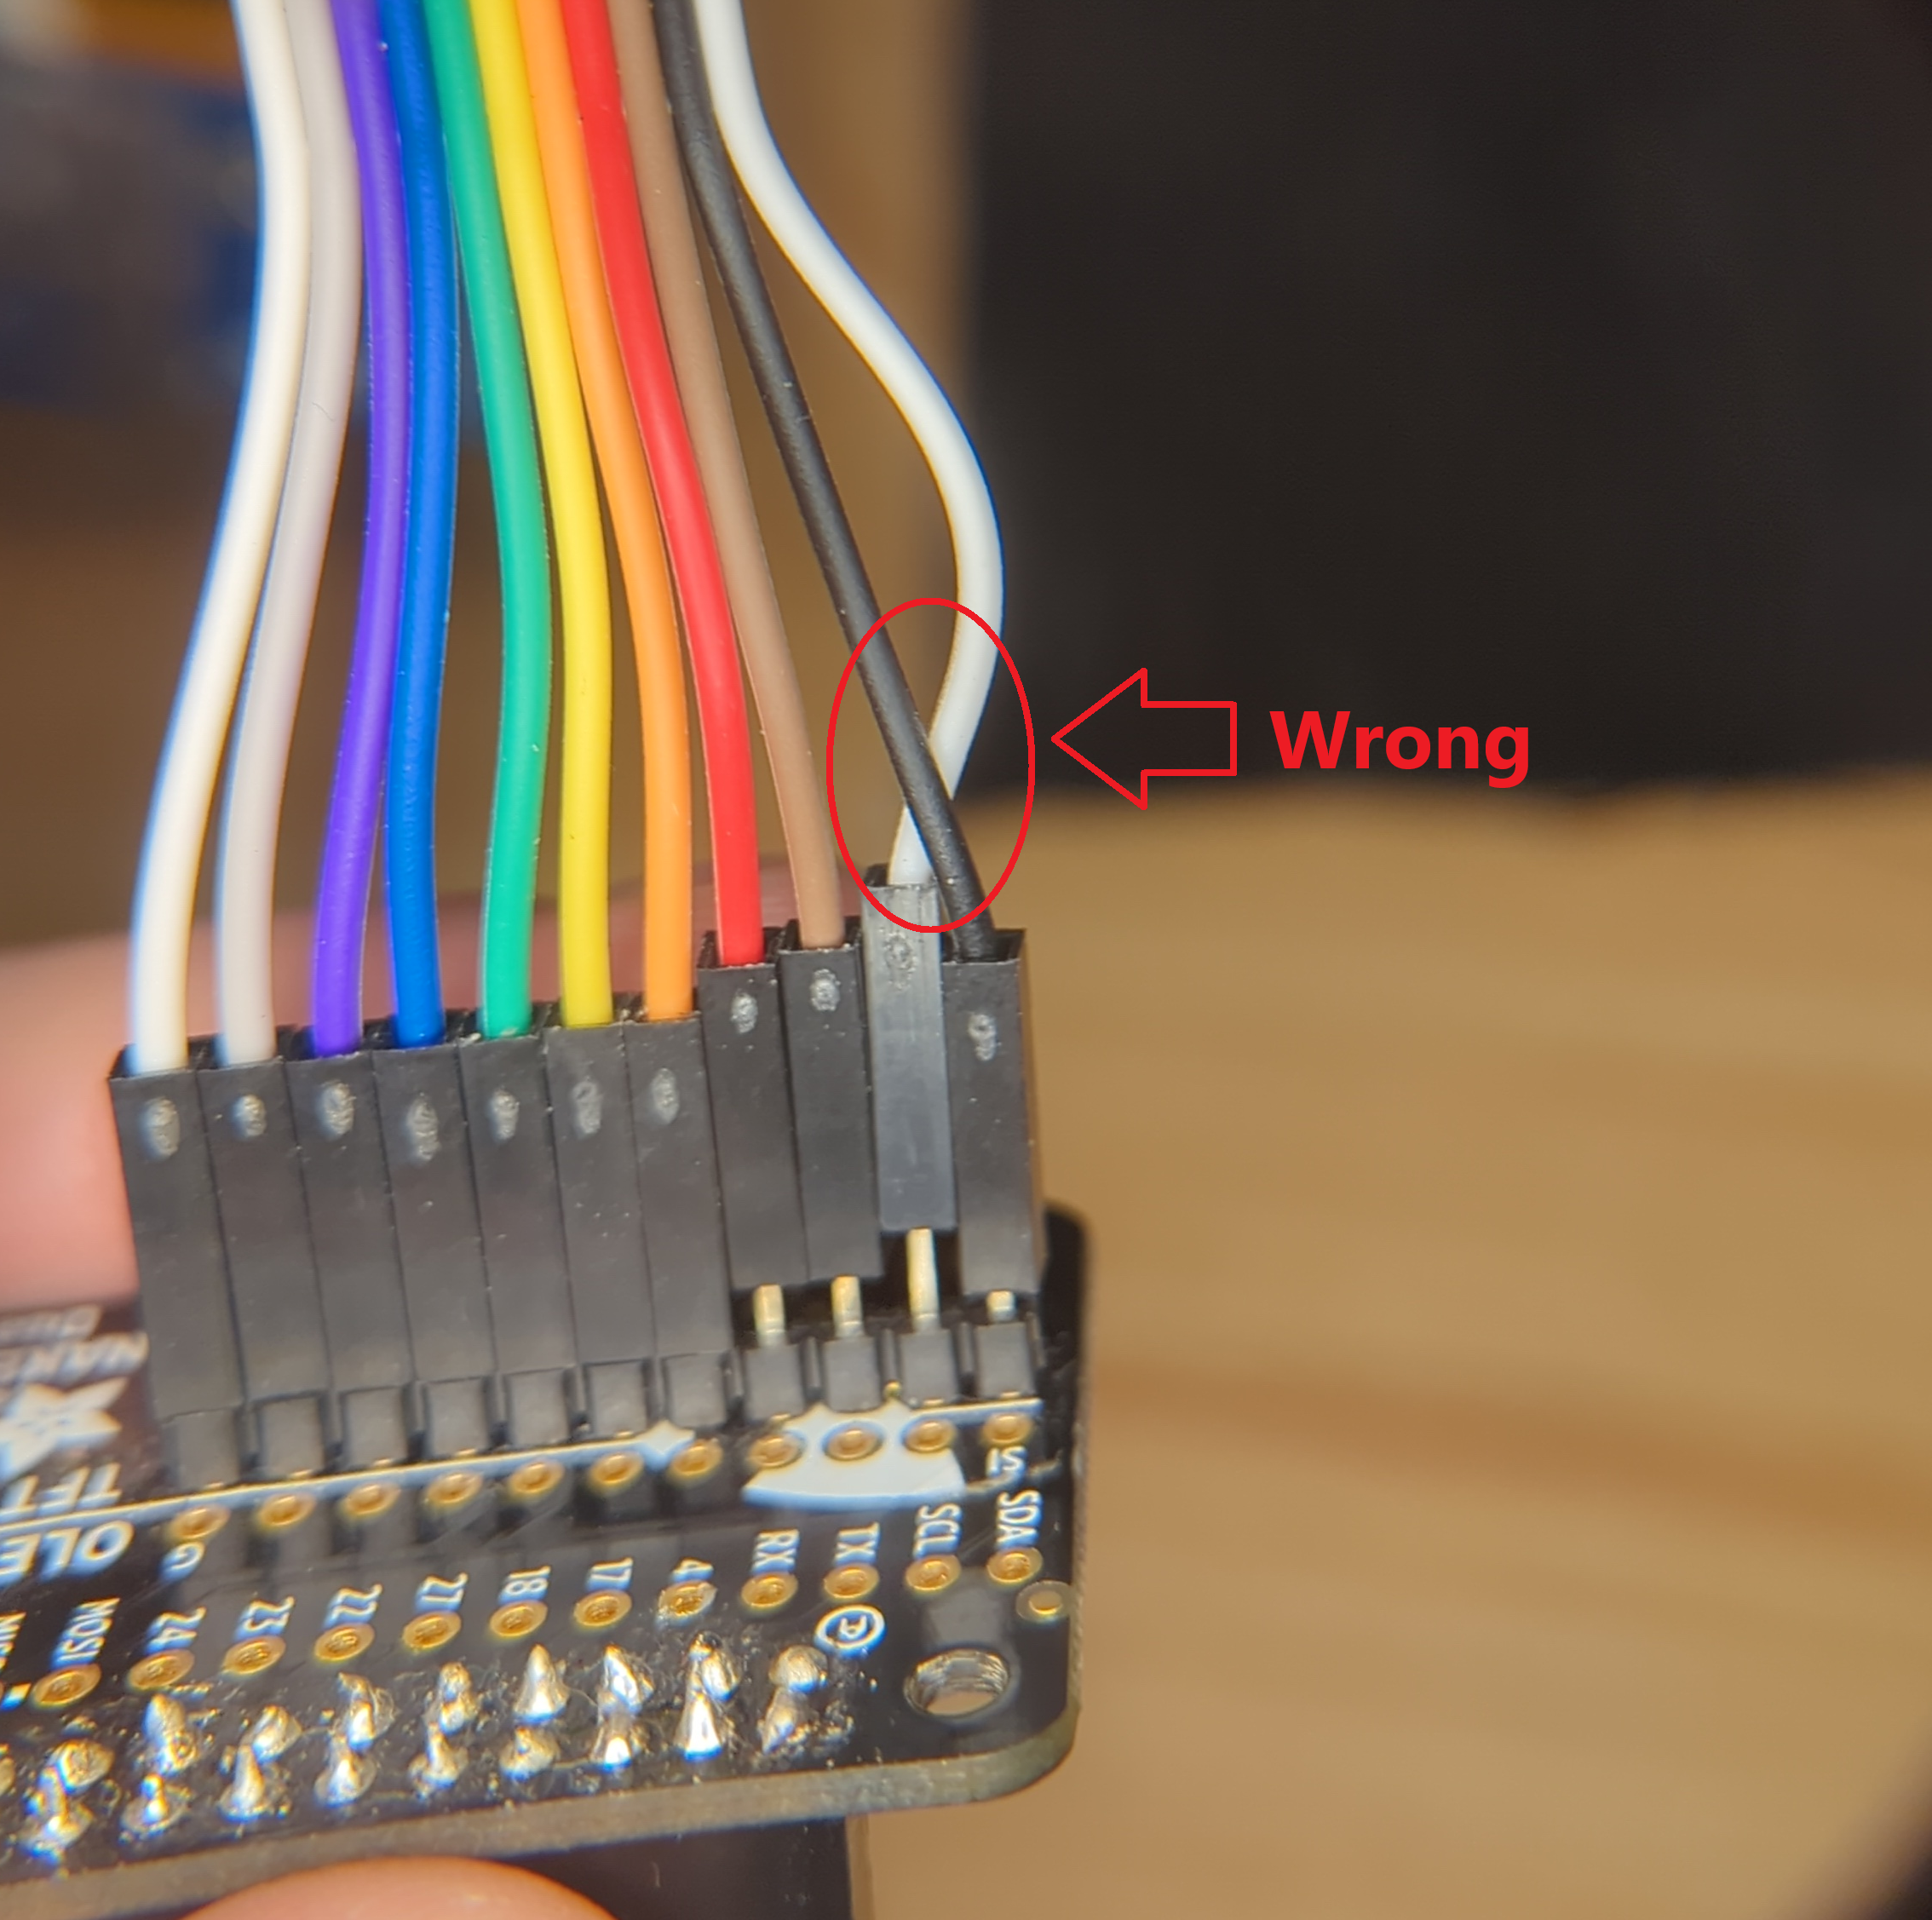
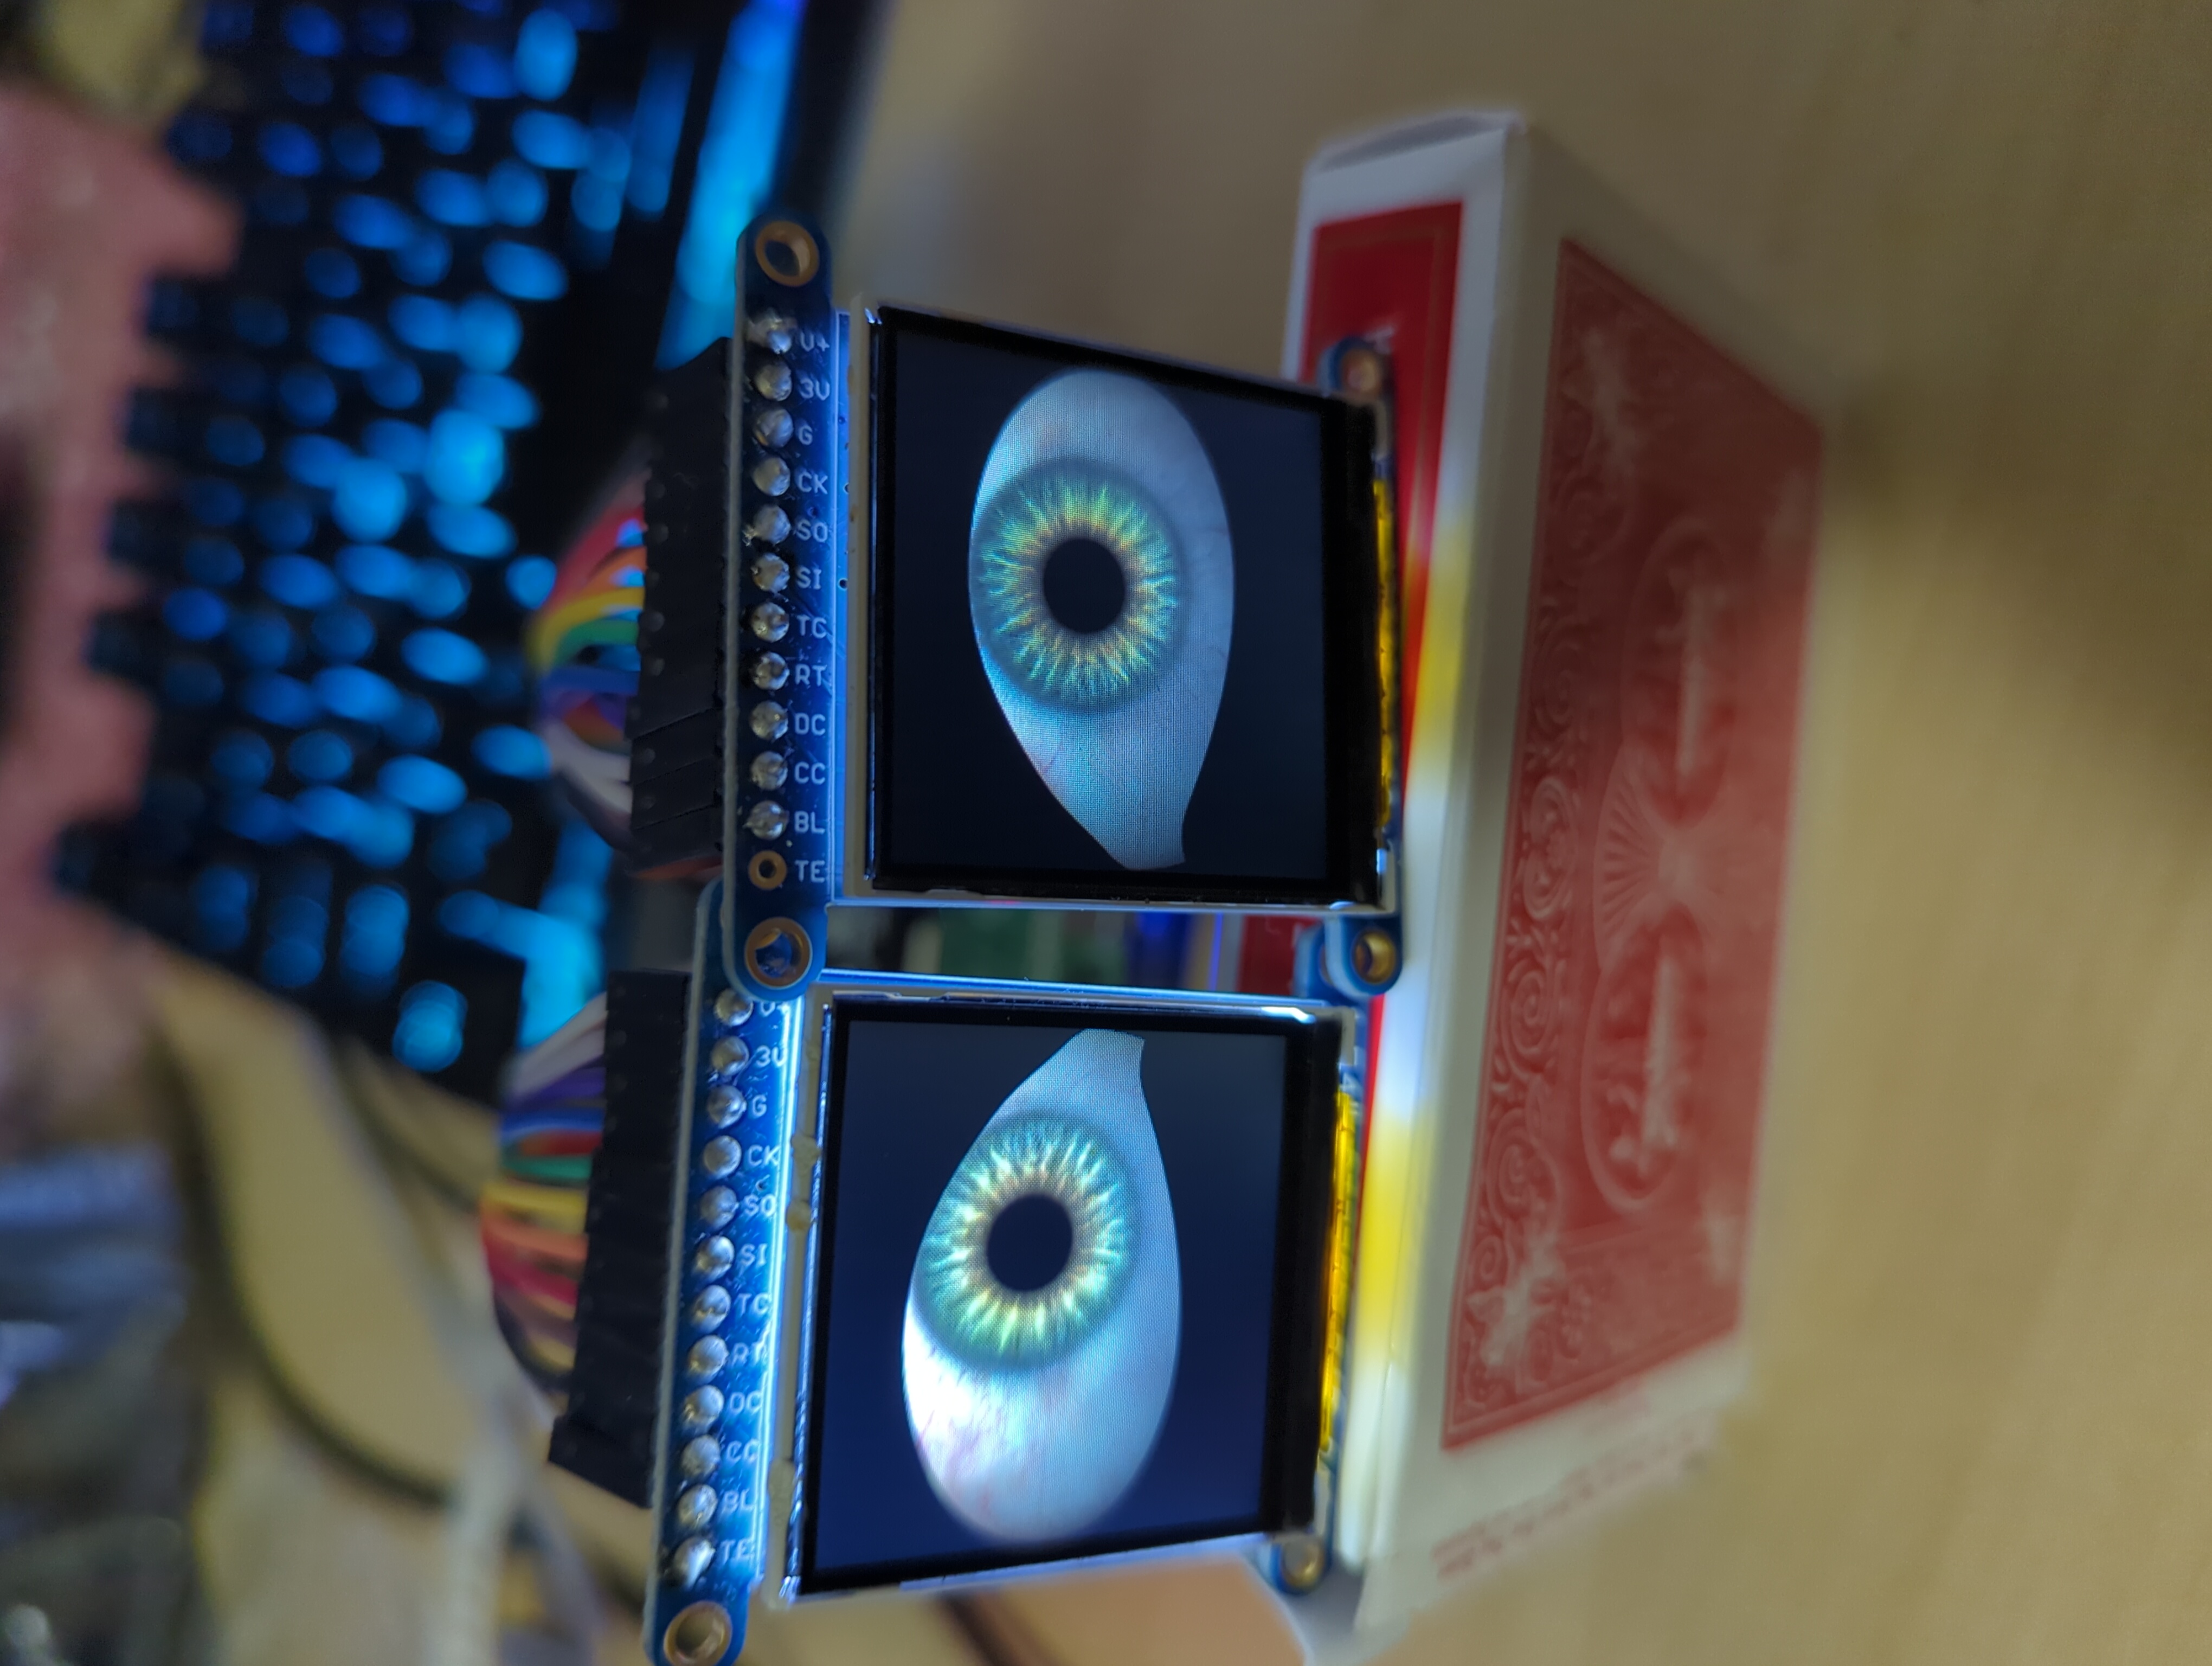
Here’s how you want it:
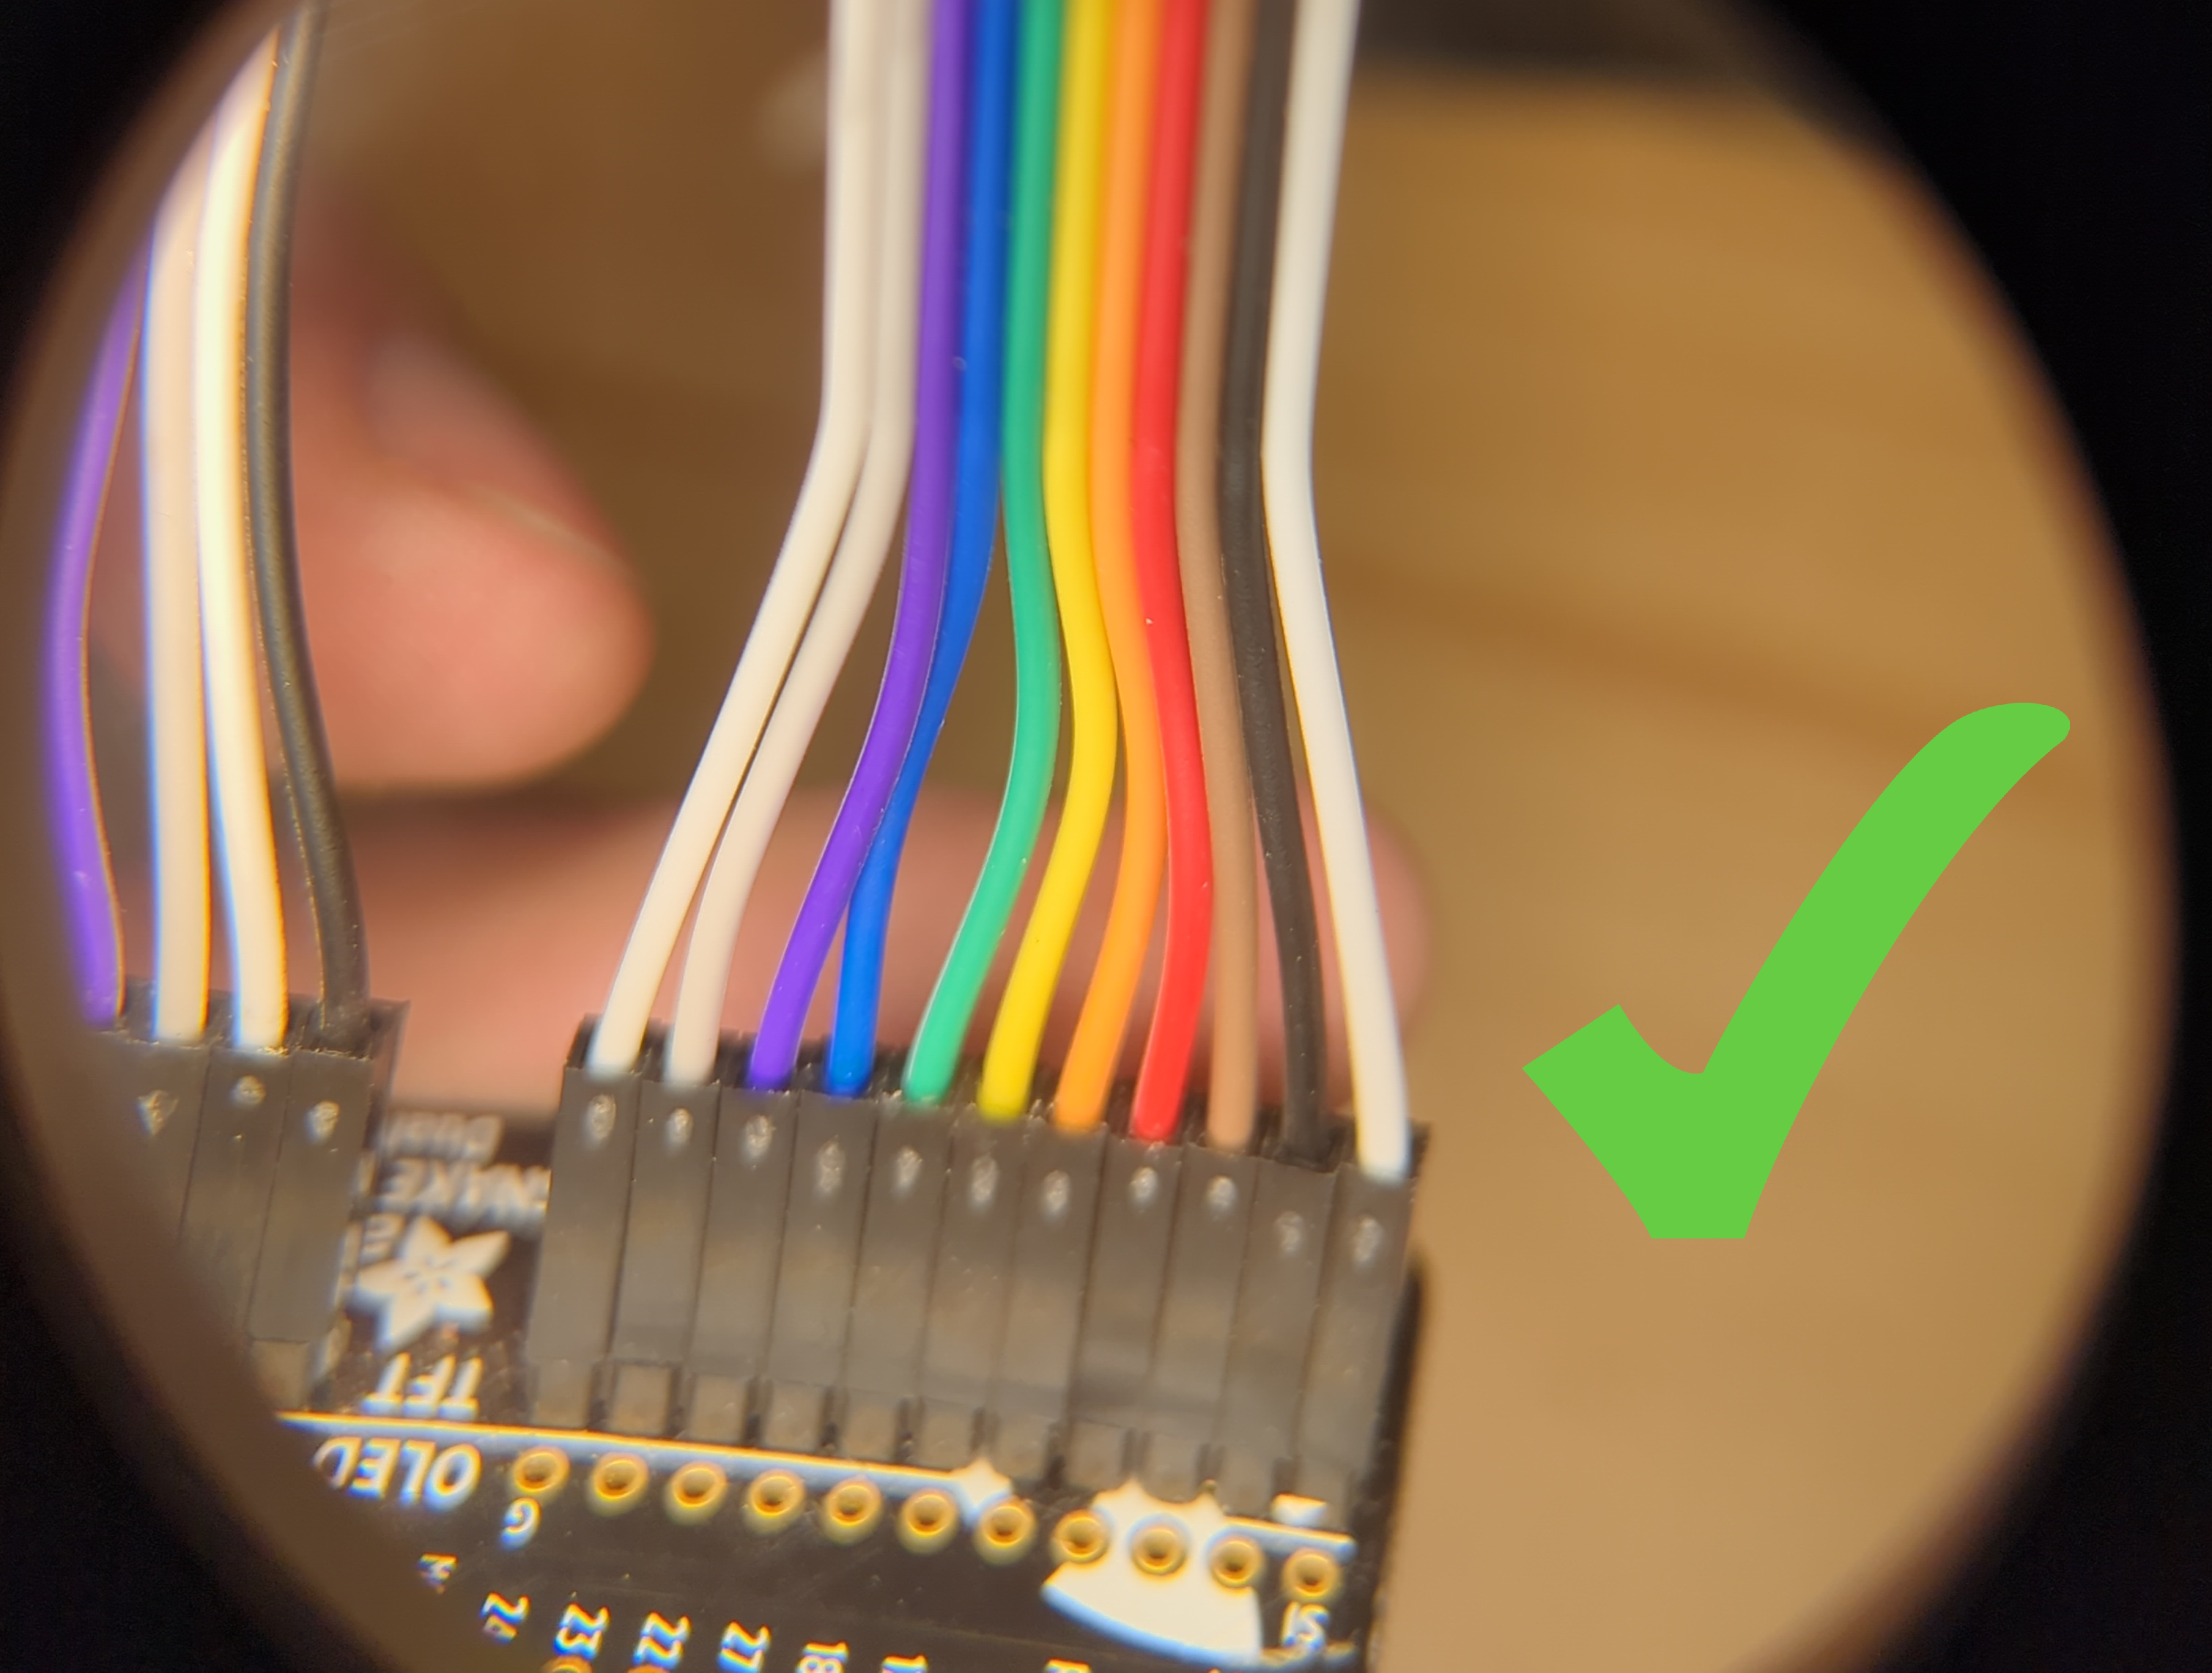
Seems obvious, but double check before you boot up.
Deploy Snake Eyes
1. Log into your Raspberry Pi with the IP address we discovered earlier, using the username and password we defined using the Raspberry pi Imager.
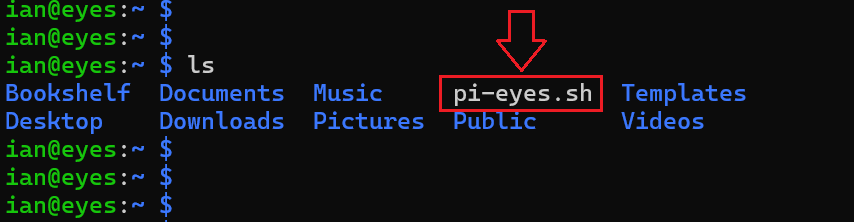
2. Run the following command to get install script:
curl https://raw.githubusercontent.com/adafruit/Raspberry-Pi-Installer-Scripts/master/pi-eyes.sh >pi-eyes.sh
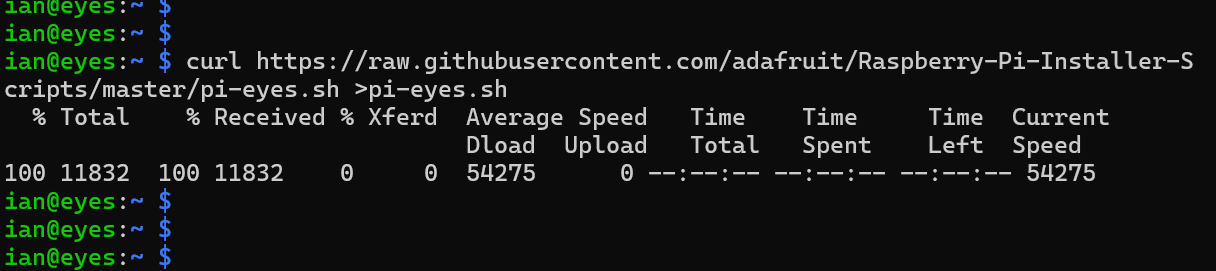
Run the script with:
sudo bash pi-eyes.sh
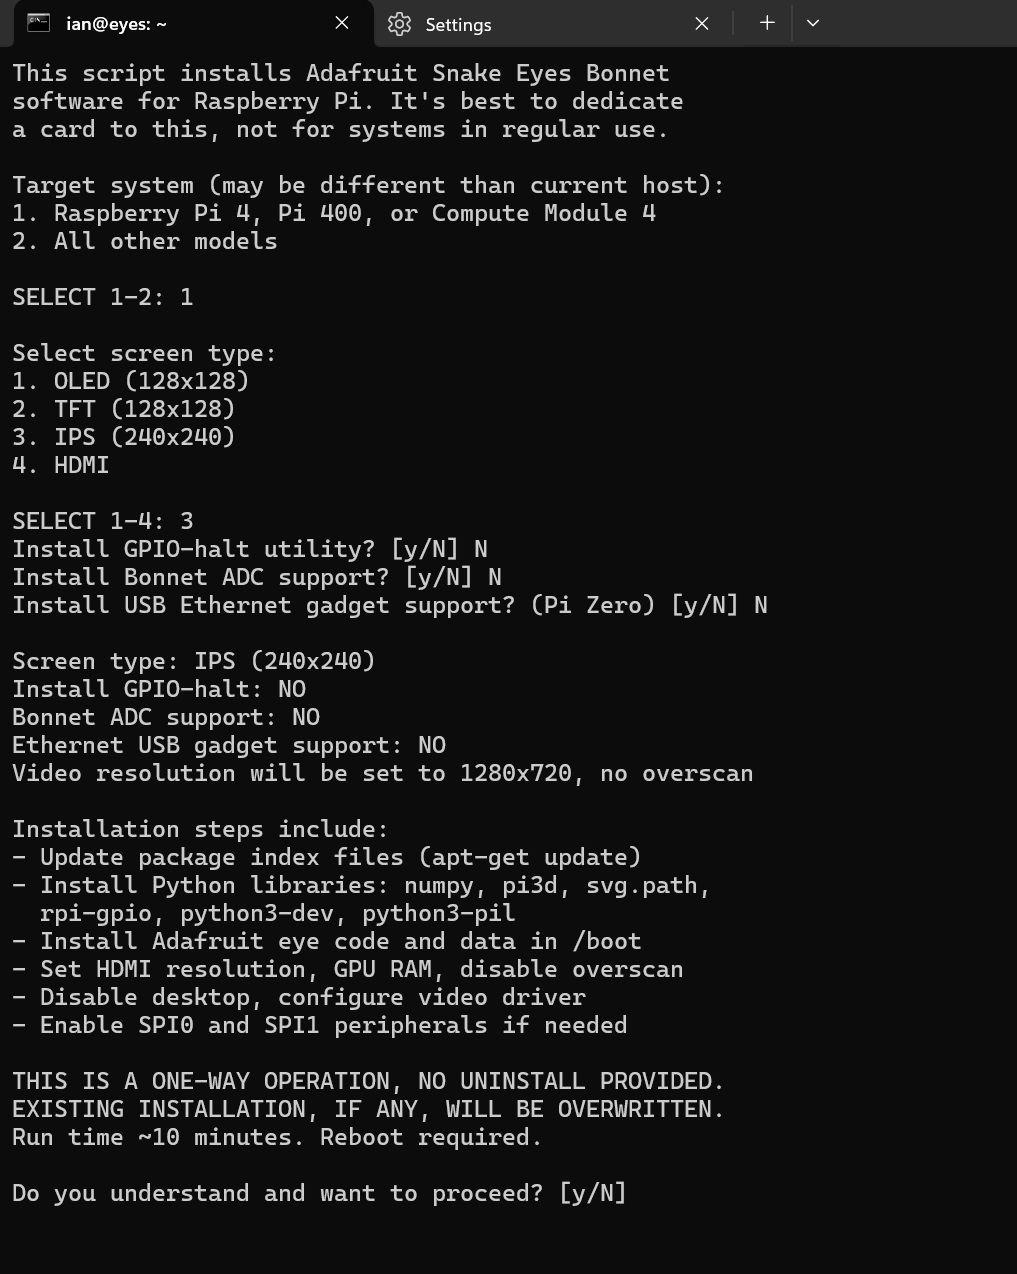
Run the script installs Adafruit Snake Eyes Bonnet software for your Raspberry Pi and will prompt you for the following (my answers are in ‘()’ and correspond with the hardware listed earlier):
- Select screen type? (#3, I’m using a 240x240 IPS)
- Install GPIO-halt utility? (N)
- Install Bonnet ADC support? (N)
- Install USB Ethernet gadget support? (N)
- Do you understand and wish to proceed? (y)
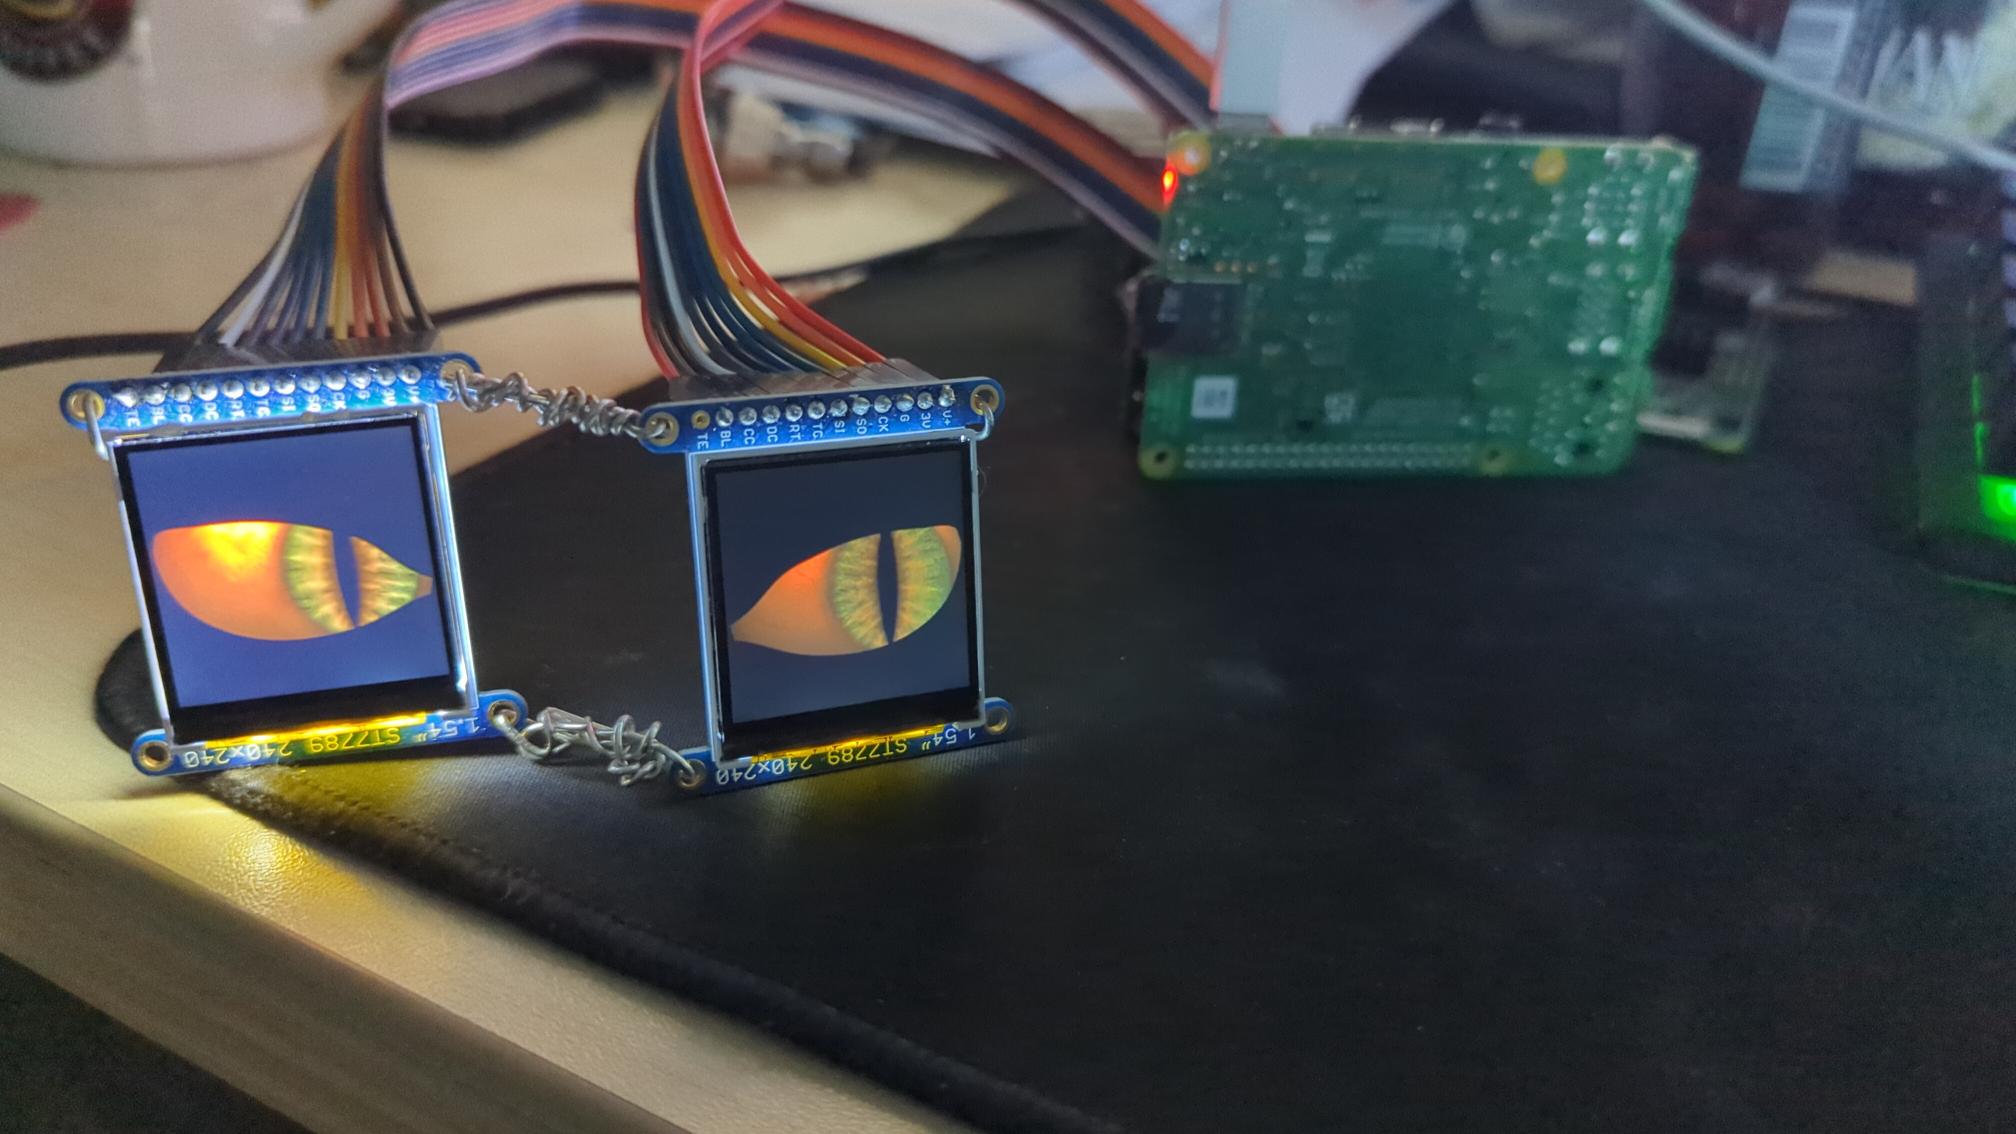
Your Pi will reboot and, if the screens are connected correctly, you’ll see a pair of eyes looking back at your after about a minute or two.
Customize Eye Shape, Colour, Iris, Sclera, etc.
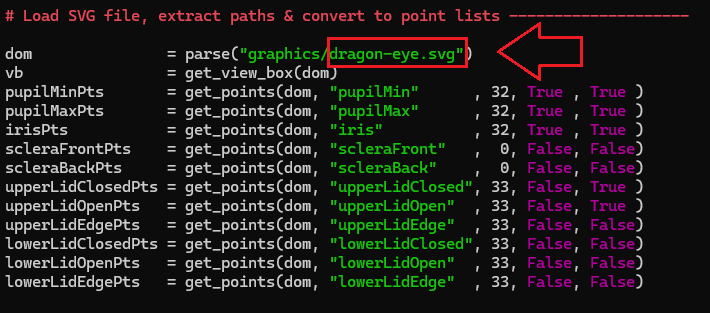
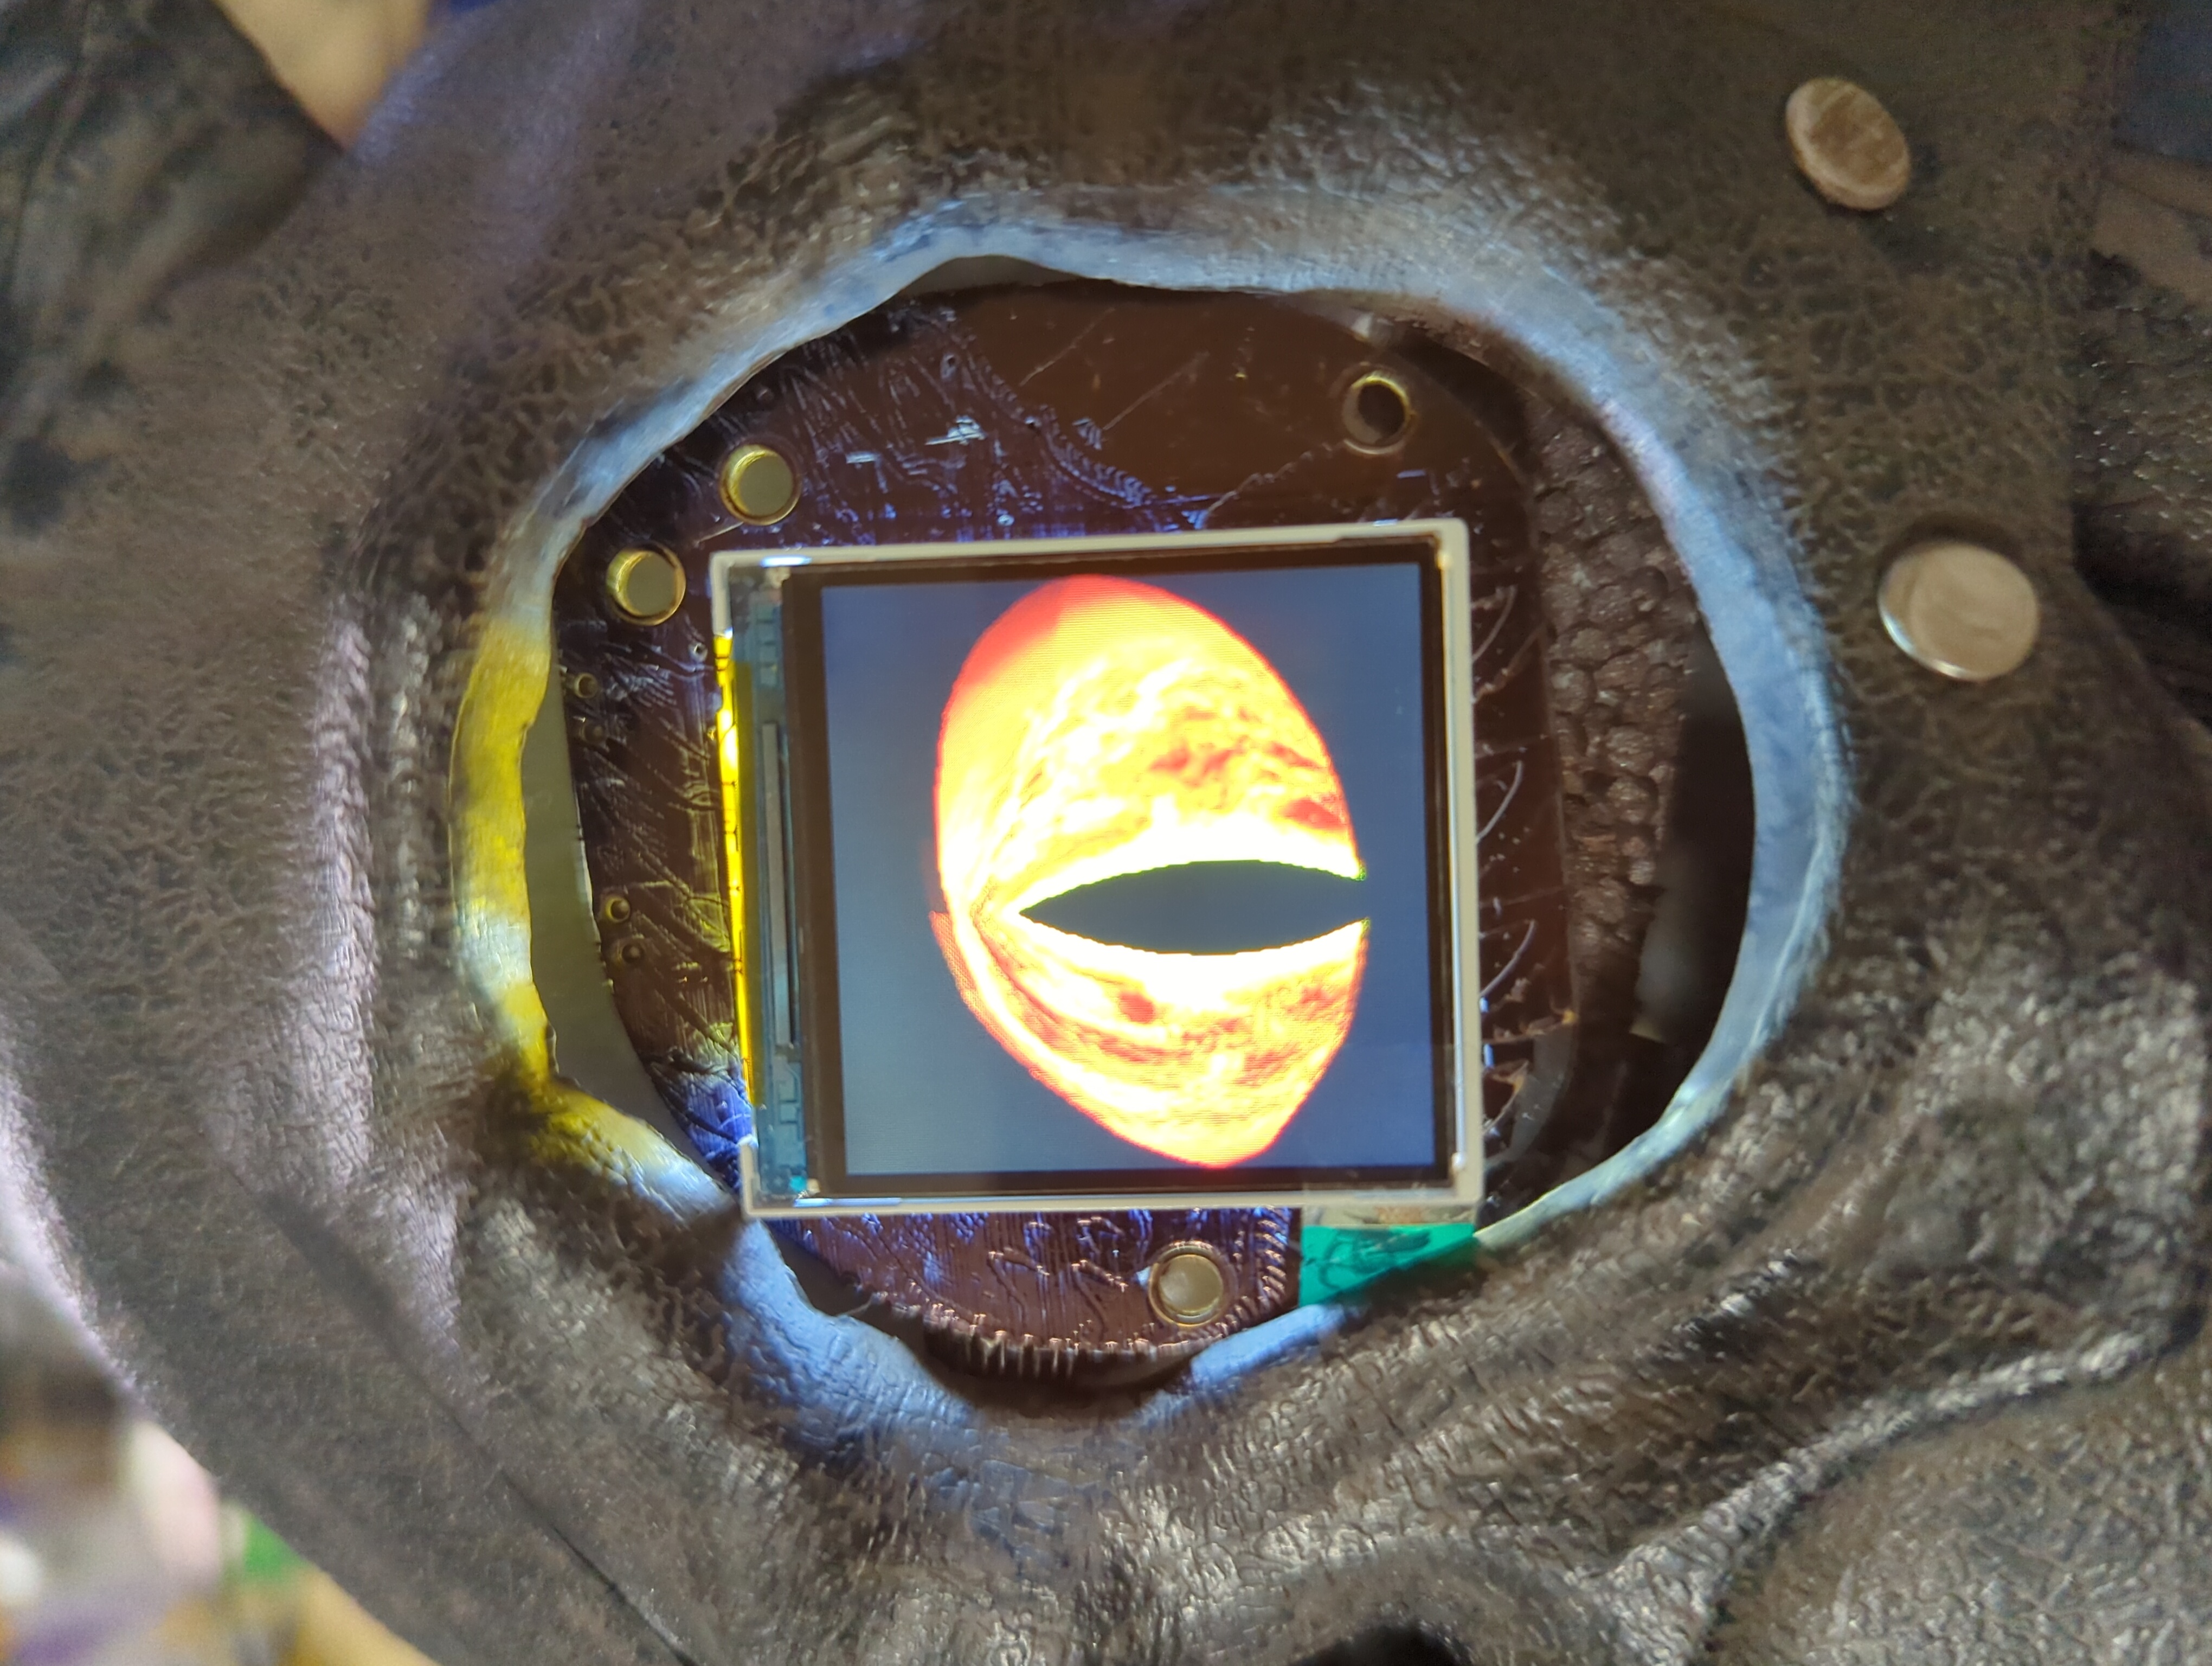
There’s a fantastic deep dive into writing custom eyeballs from scratch here on Adafruit.com that I highly recommend checking out. However, we’re going to tweak the existing code and leverage what we have for a quick win. The texture maps and graphics for some extra creepy dragon eyes are hidden in your Pi, we just need to copy the default python script and edit it to point to the ‘dragon’ iris, sclera, and map shown here:

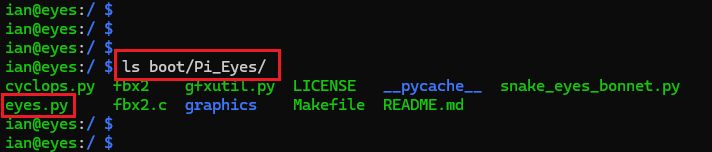
1. Log into your raspberry pi and cd .. a couple times back to the root and list the contents of boot/Pi_Eyes as illustrated below. We’re looking for the eyes.py file:
2. Copy this guy over to a new file called dragon.py with the following command:
sudo cp boot/Pi_Eyes/eyes.py boot/Pi_Eyes/dragon.py
Then list the contents again to see it:

We’re going to edit this file in the next step.
3. Use your favourite text editor (don’t judge, nano is just easy 👻) to open up the new dragon.py file we just created.
sudo nano boot/Pi_Eyes/dragon.py
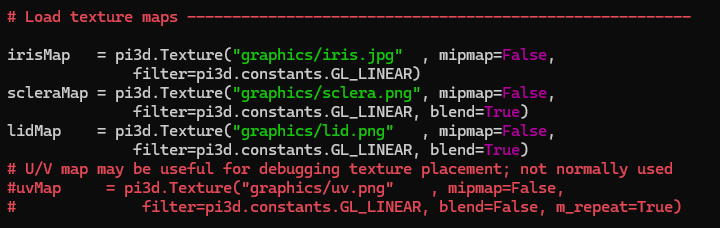
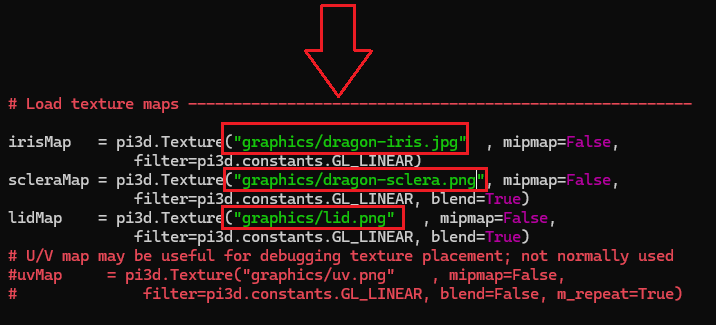
4. Make the following changes:
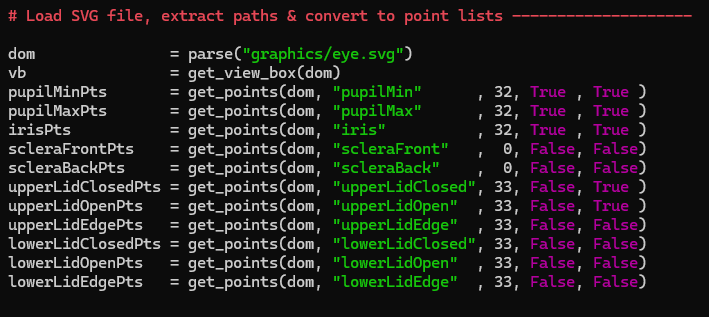
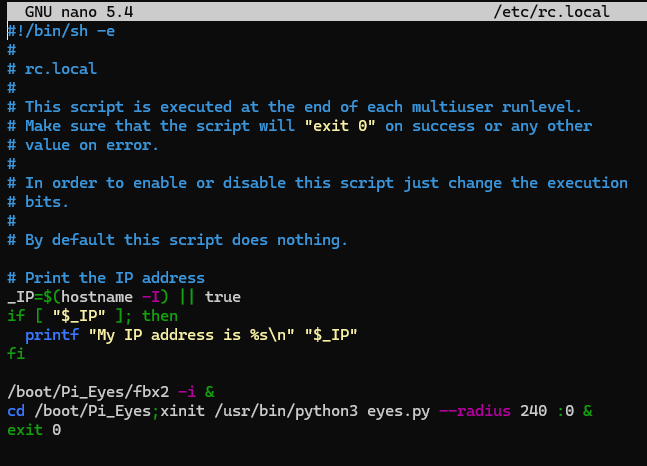
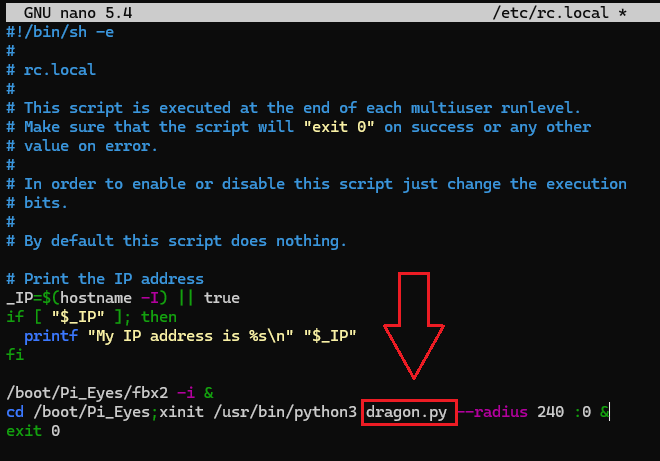
5. Lastly, we need to swap out the default .py file used in rc.local for boot up and reboot to see our regular eyes morph into dragon eyes! 👀
Use the following command to edit the rc.local file as shown below:
sudo nano /etc/rc.local
6. Reboot and sit back with the following:
sudo reboot now
Light up a Pumpkin!
(or a pirate Skull 💀 🏴☠️ )

Part 2 - Monster M4SK
So the dragon eyes we just built were pretty cool, but kinda bulky and heavy to integrate into any decent halloween outfit. I’m going to pop this guy into an empty skull or a carved out pumpkin this year. For my actual costume, I thought we could do better.
Enter the Adafruit Monster M4SK. This thing is awesome. It’s got a small form factor processor in the back that’s powerfull enough to run the eyes on both screens effortlessly without the bulk and weight of a Raspberry Pi.
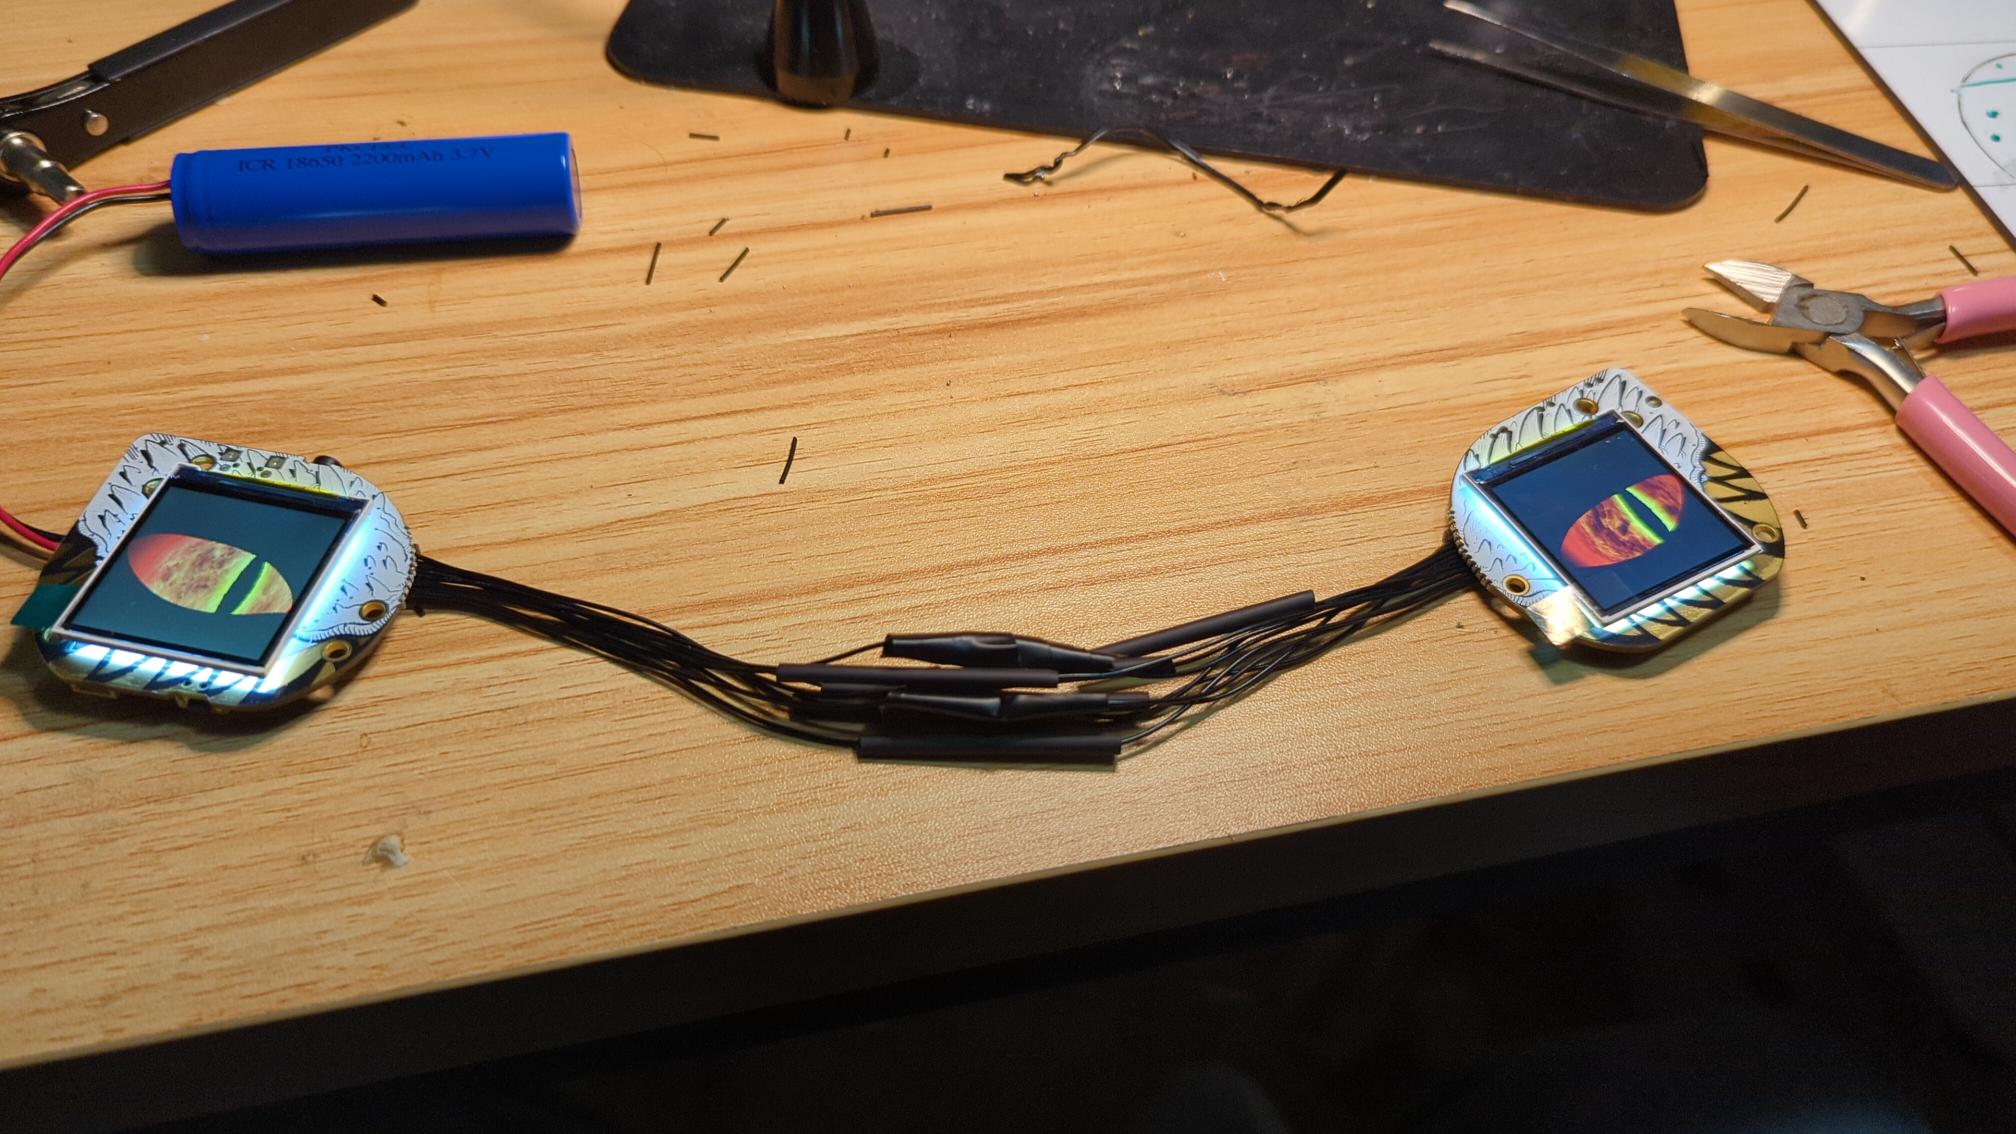
Extend the Distance Between the Eyes:
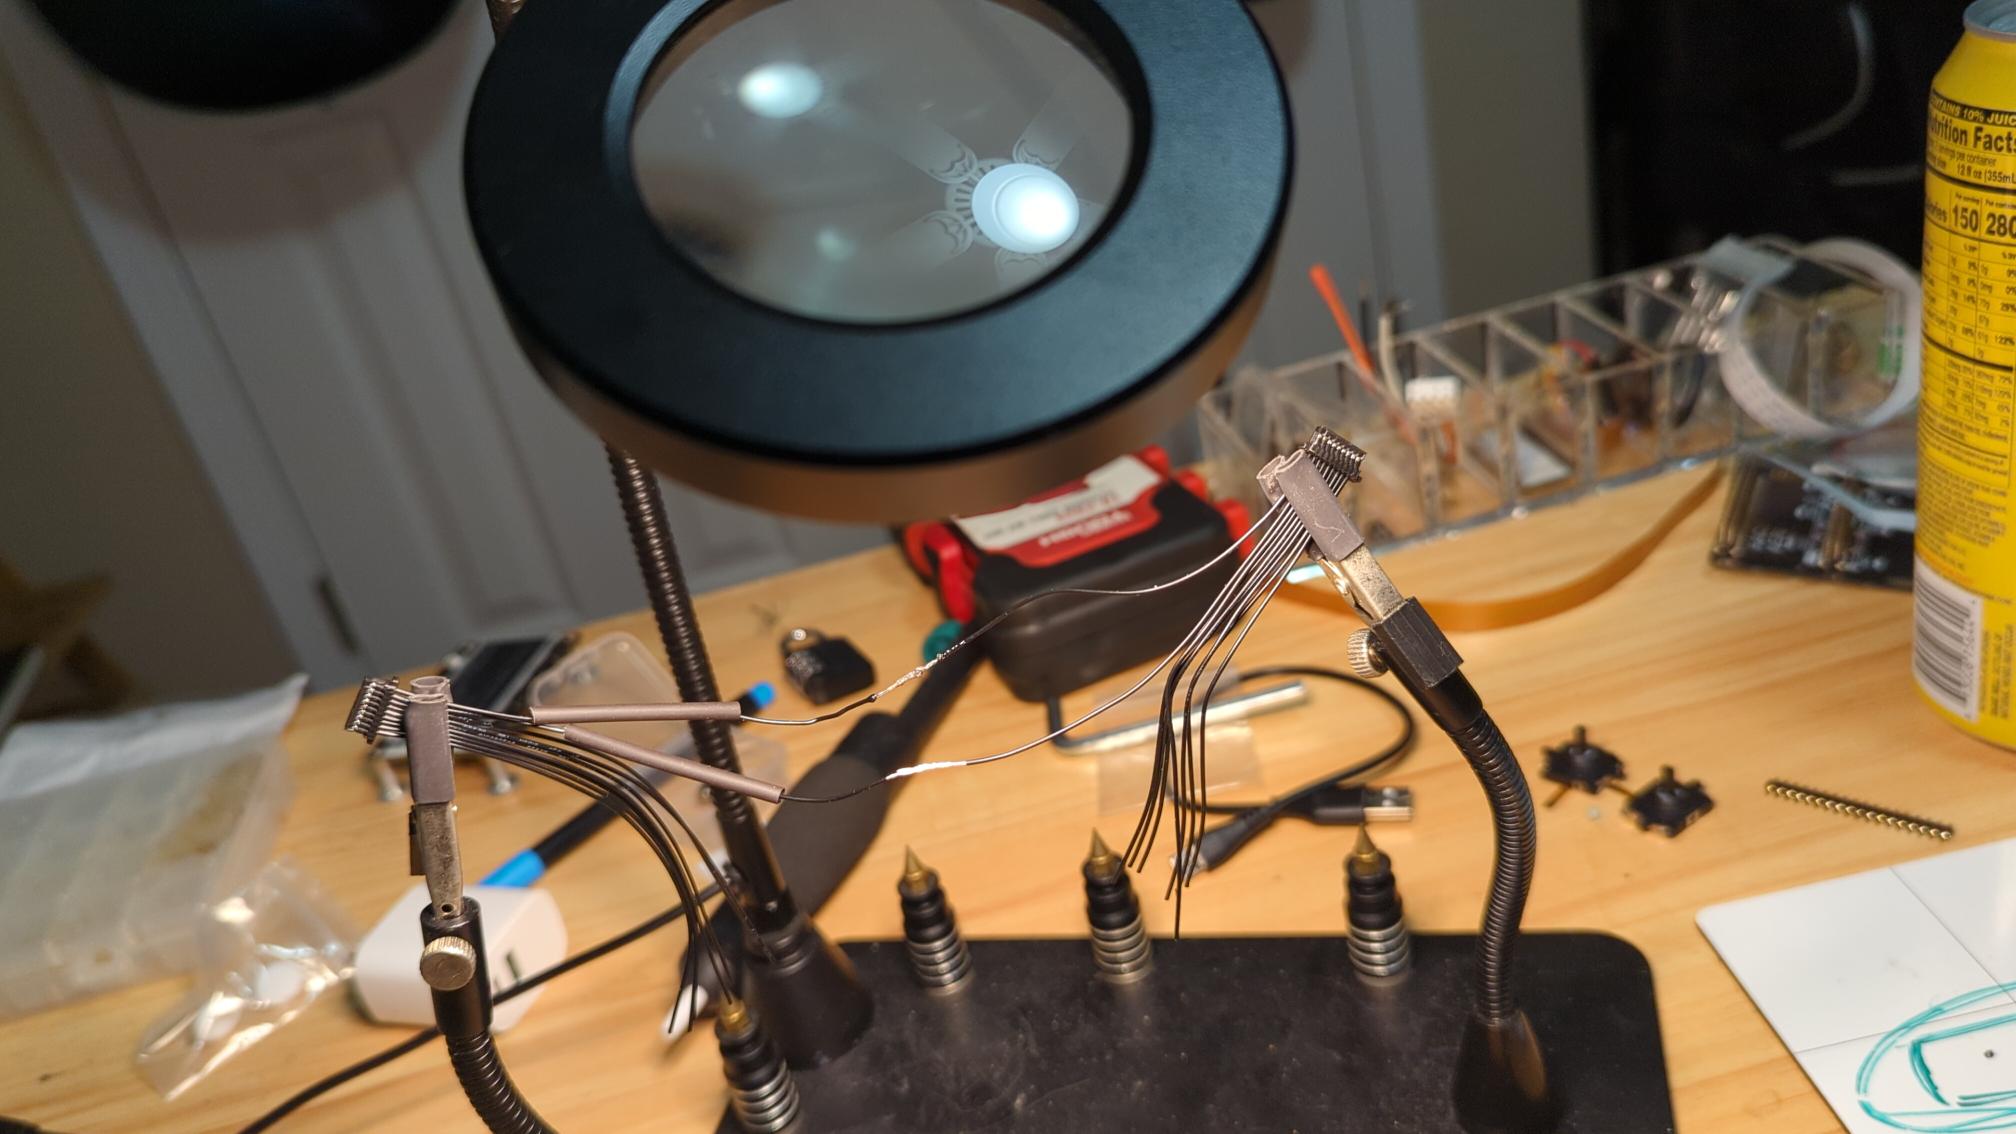
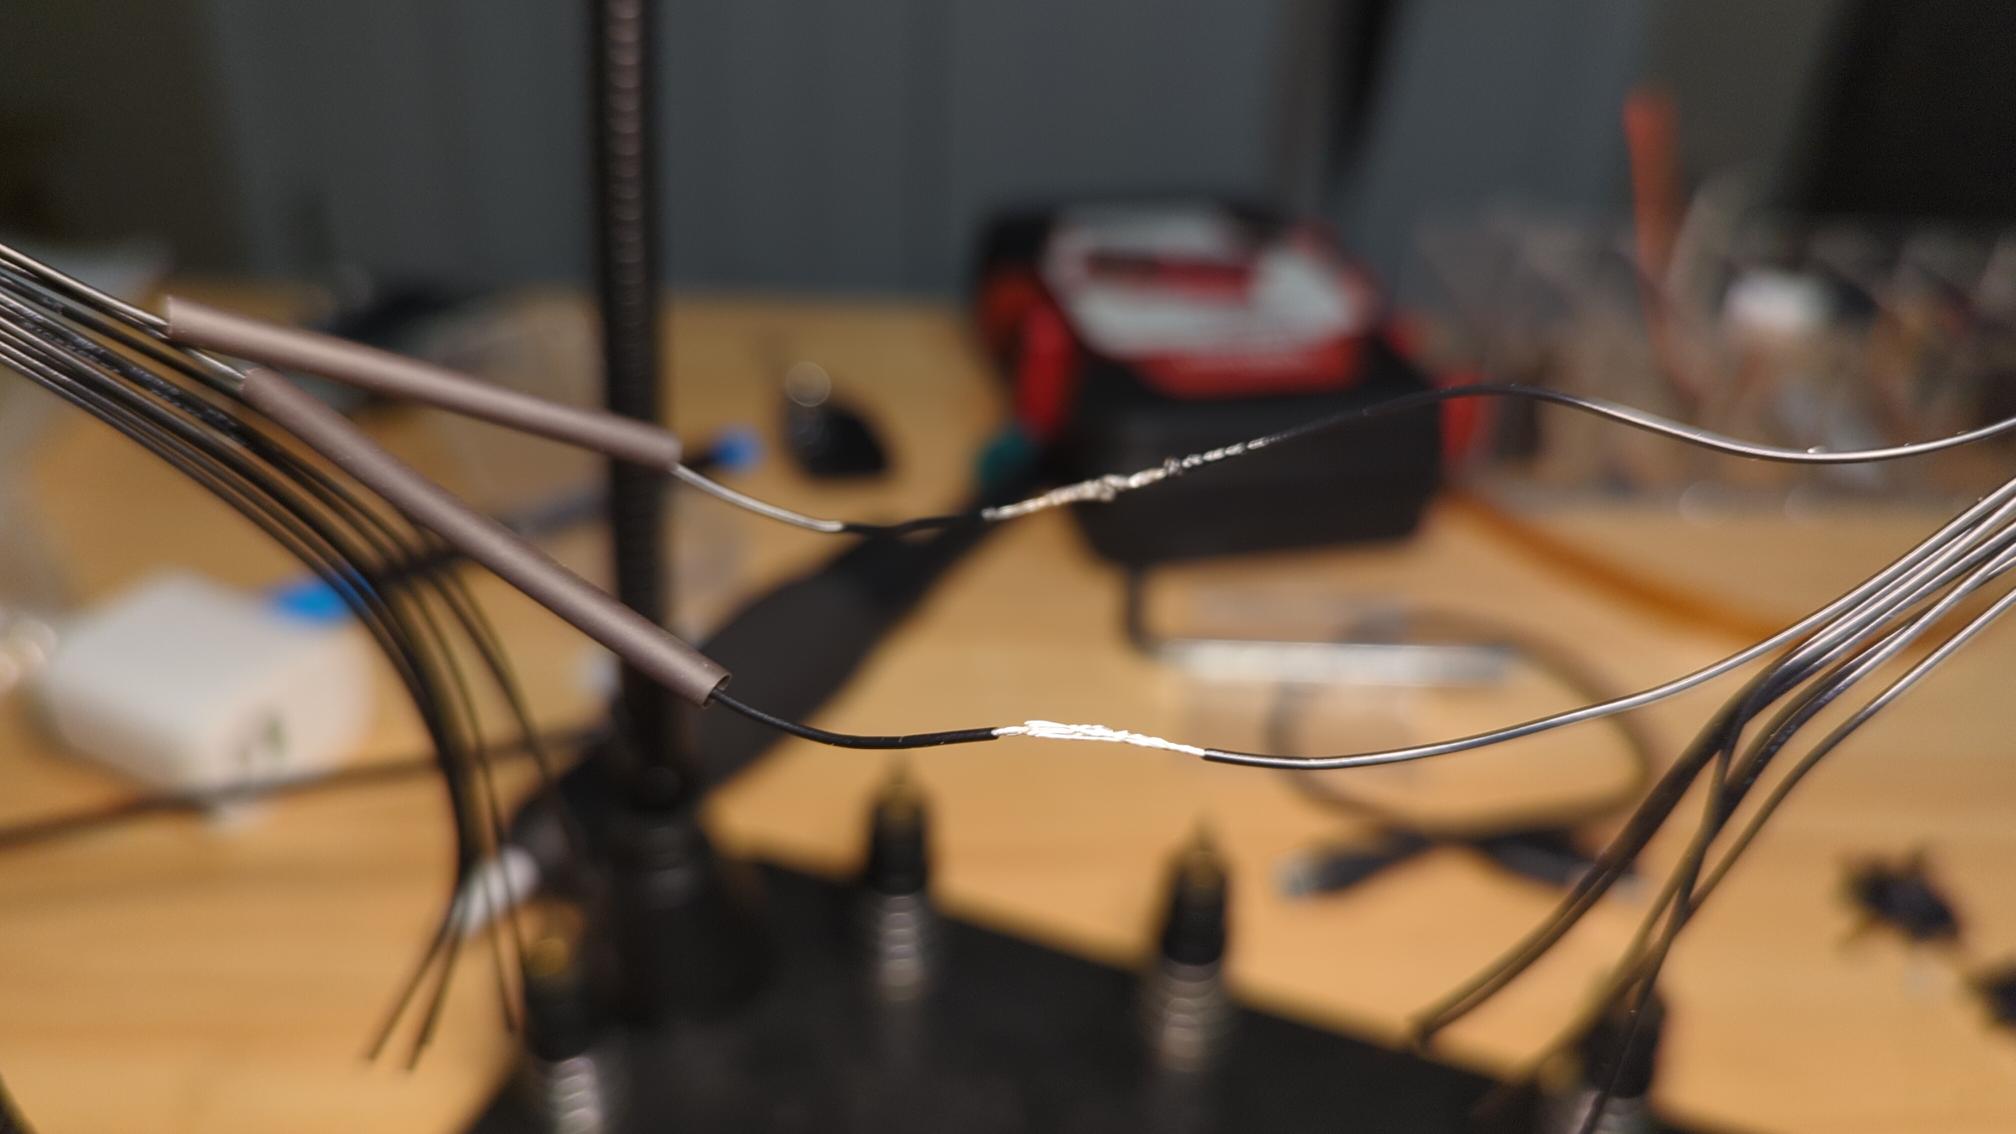
You’ll need some heat shrink tubing for this. A hair dryer will do if you don’t have a heat gun. Electrical tape will do for any you miss.
Here’s a great guide for breaking the eyes apart and connecting them back together with a JST cable on Adafruit.com. The only issue I had was that, even with the 100mm JST cable, the eyes still weren’t far apart enough to fit our mask. Time to bust out the soldering iron. I had 2 of these 100mm JST cables handy, so I snipped the ends off of both and soldered them together to make a (almost) 200mm cable, more than enough.
💡Additional Resources –> Phillip Burgess wrote a killer guide for the same mask here (maybe next year I’ll add the voice modulator)
Customize our Monster M4SK:
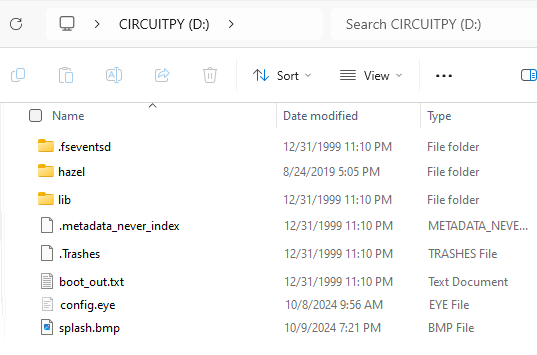
1. Plug your Monster M4SK into your computer and you should see the CIRCUIPY drive mounted:
2. Download additional eyes via zip file here from learn.adafruit.com
3. Once you’ve got the eyes you want and their respective folders uploaded to the Monster M4Sk, all you have to do is copy the config.eye file you want to use, to the root (the odefault eye is “hazel” and the original config.eye is in the “hazel” folder; if you ever need to go back, just copy the config.eye from the hazel folder to root and reboot).
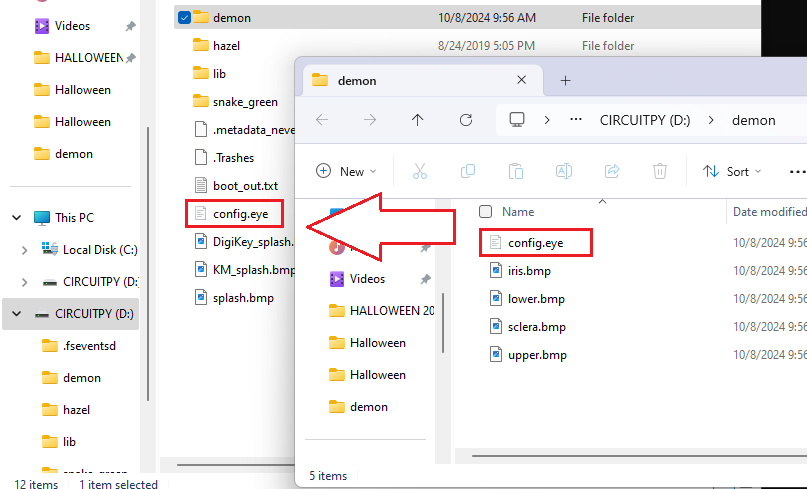
4. To swap out your eyes, it’s as easy and swapping out the config.eye file from the folder containing the eyes you want.
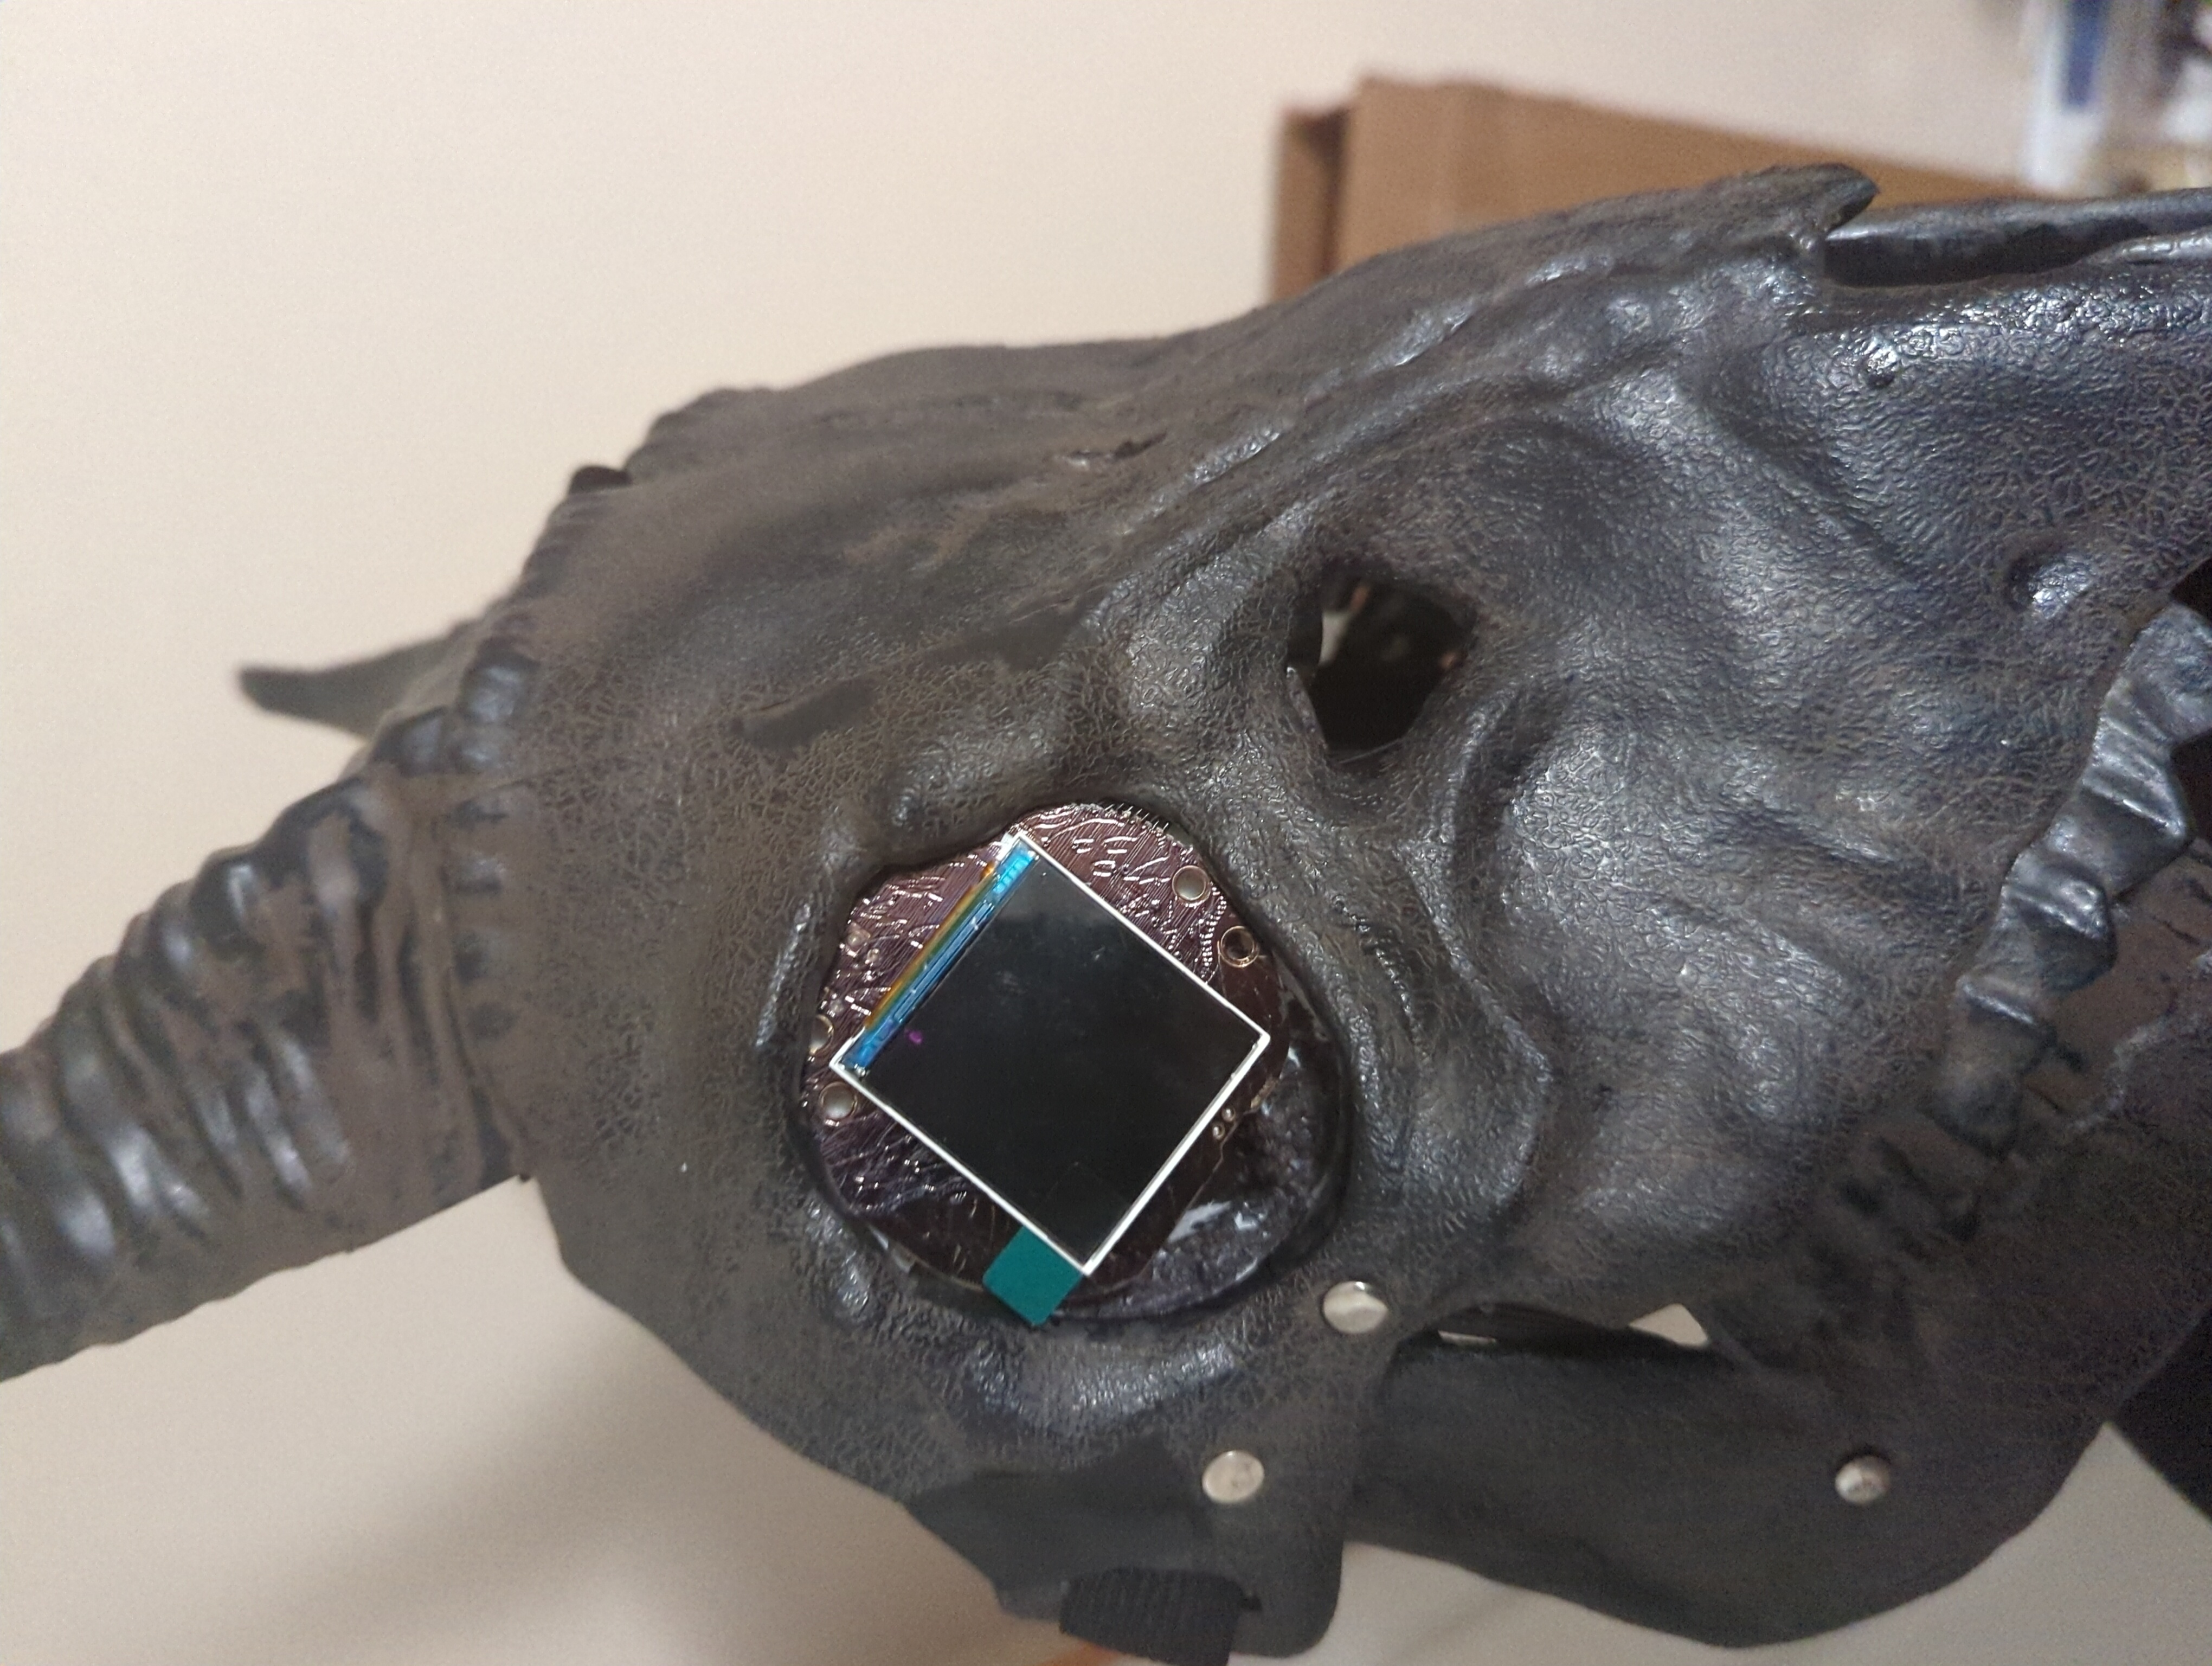
Spook the neighbour’s kids!
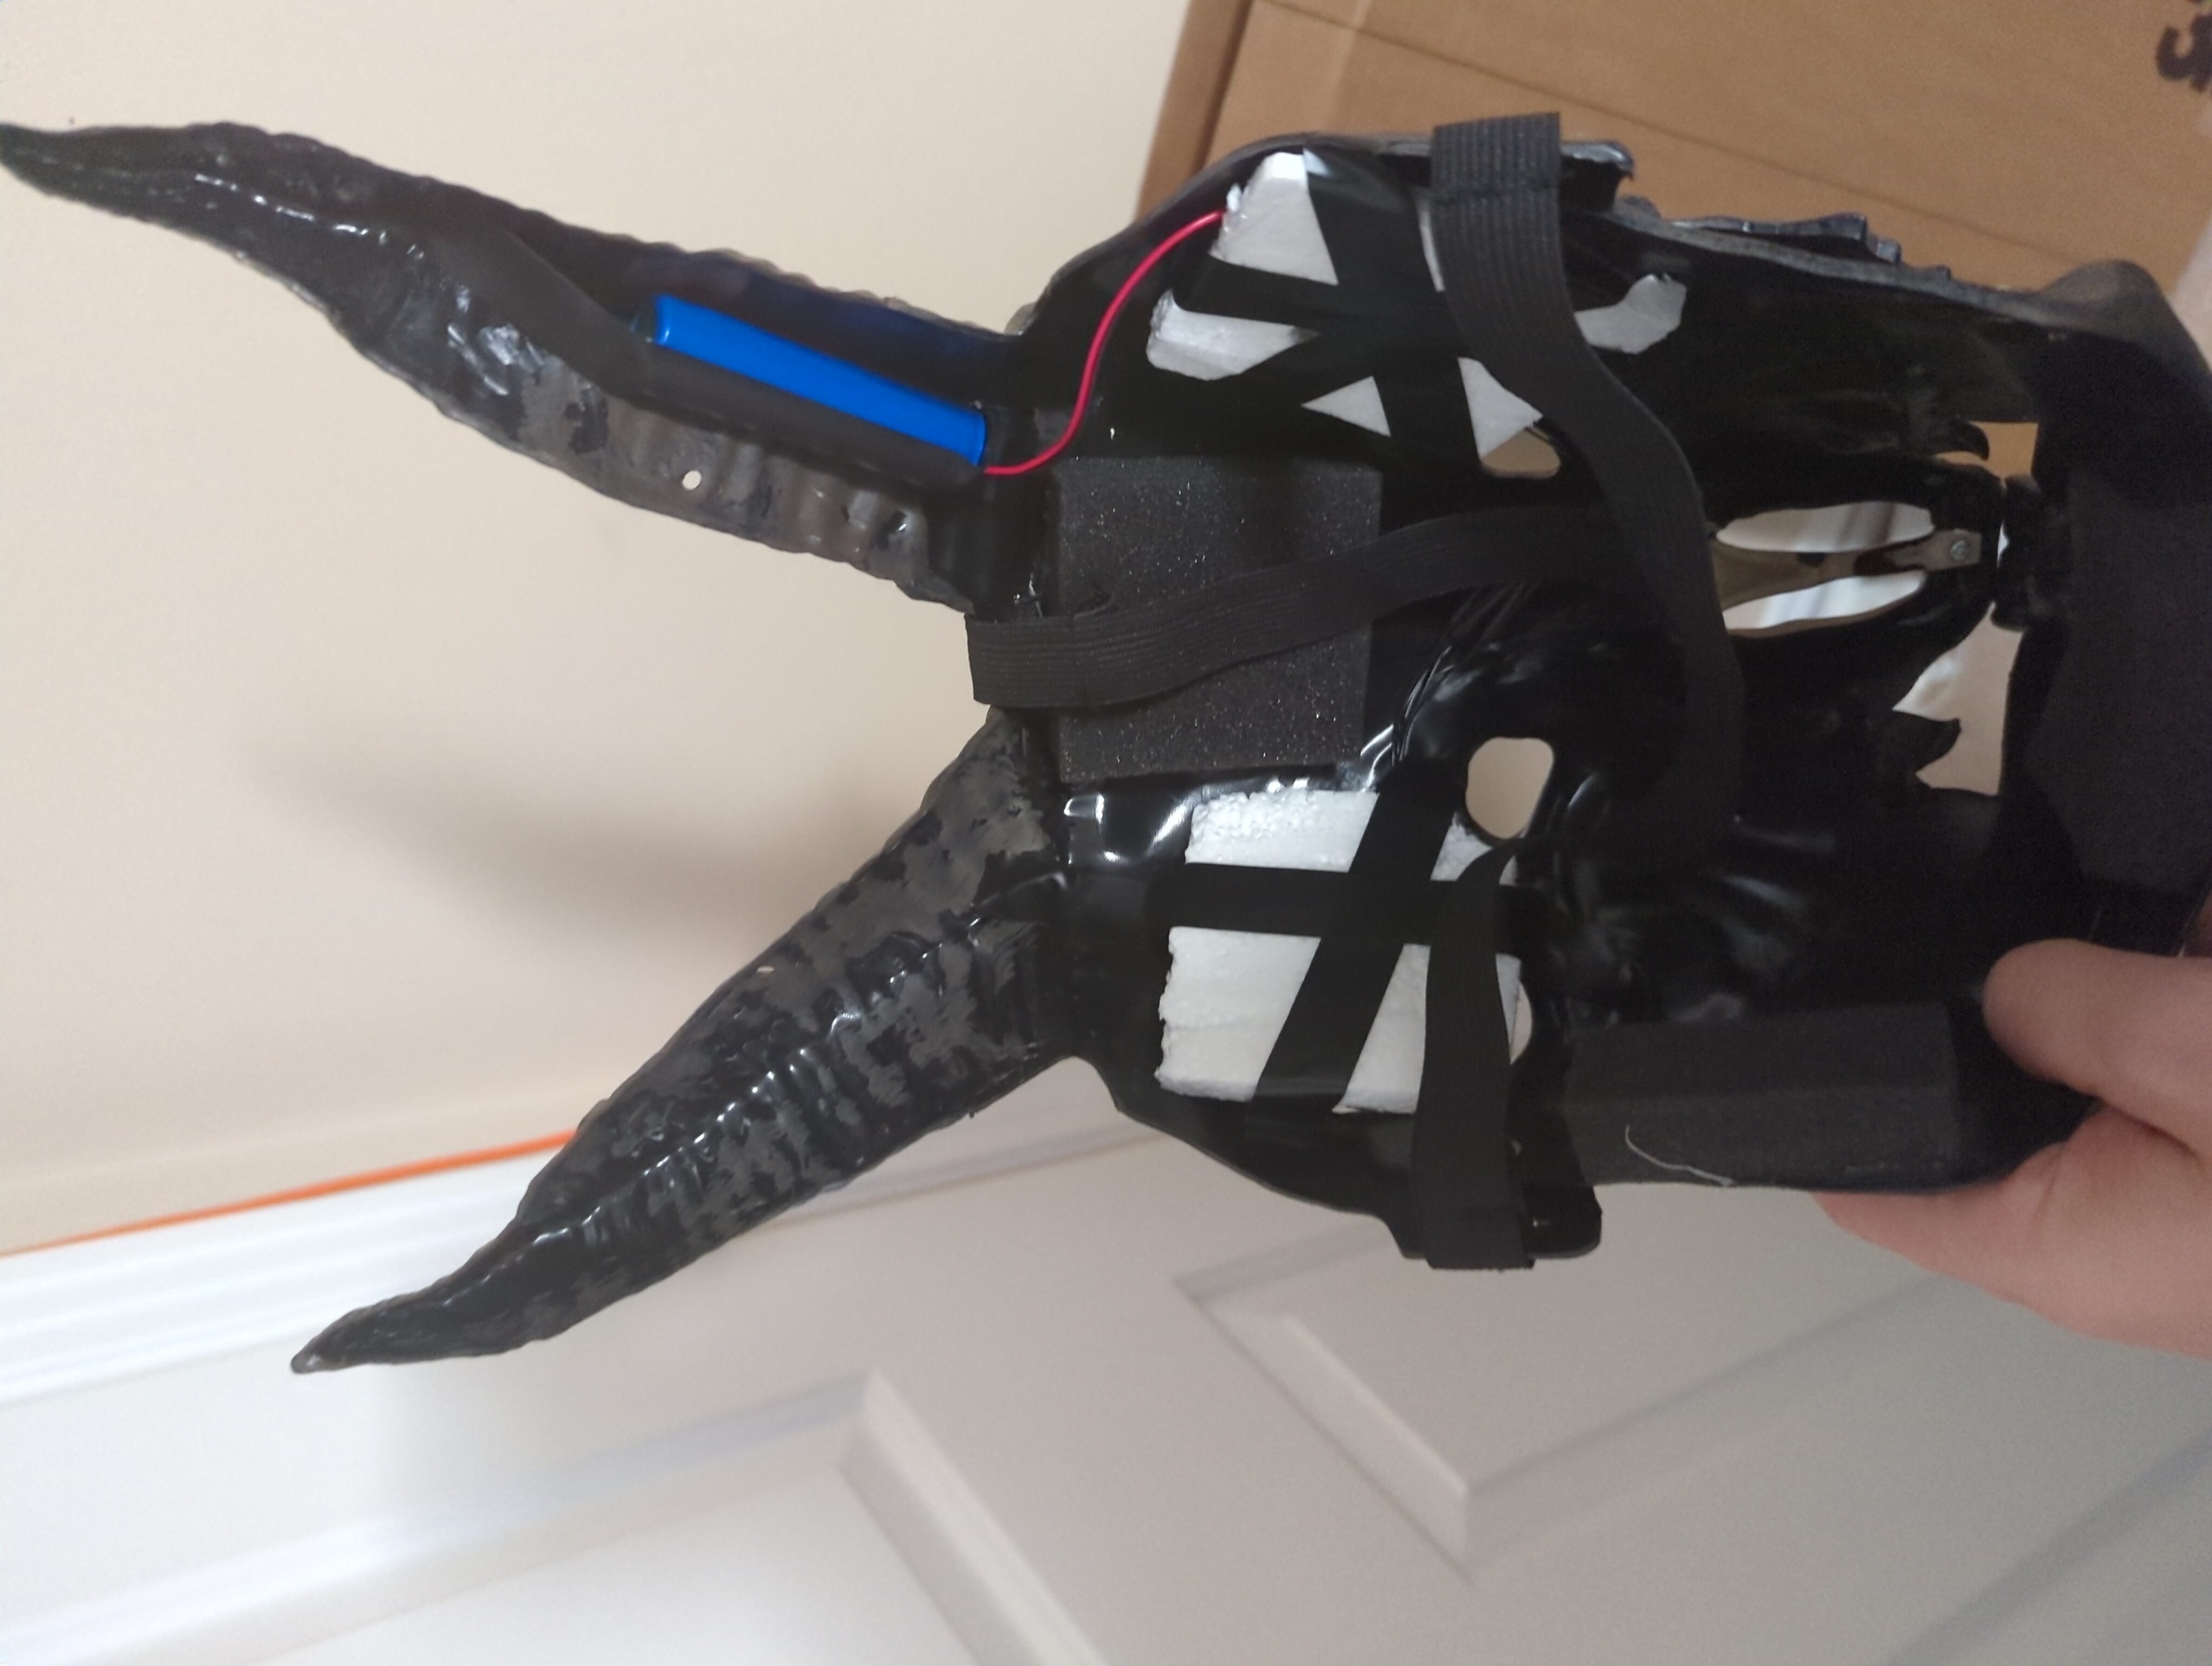
I used some styrofoam and a sharpie to insulate and black out the Monster M4SK board around the displays, then taped them to the inside of the mask. My vision isn’t obstructed because the primary viewpoint is through the nostrils of this haunted goat thing. I’ve also taped that Lithium Ion Cylindrical Battery (3.7v, 2200mAh) to the inside of one of the horns (I swear this mask was made for this).
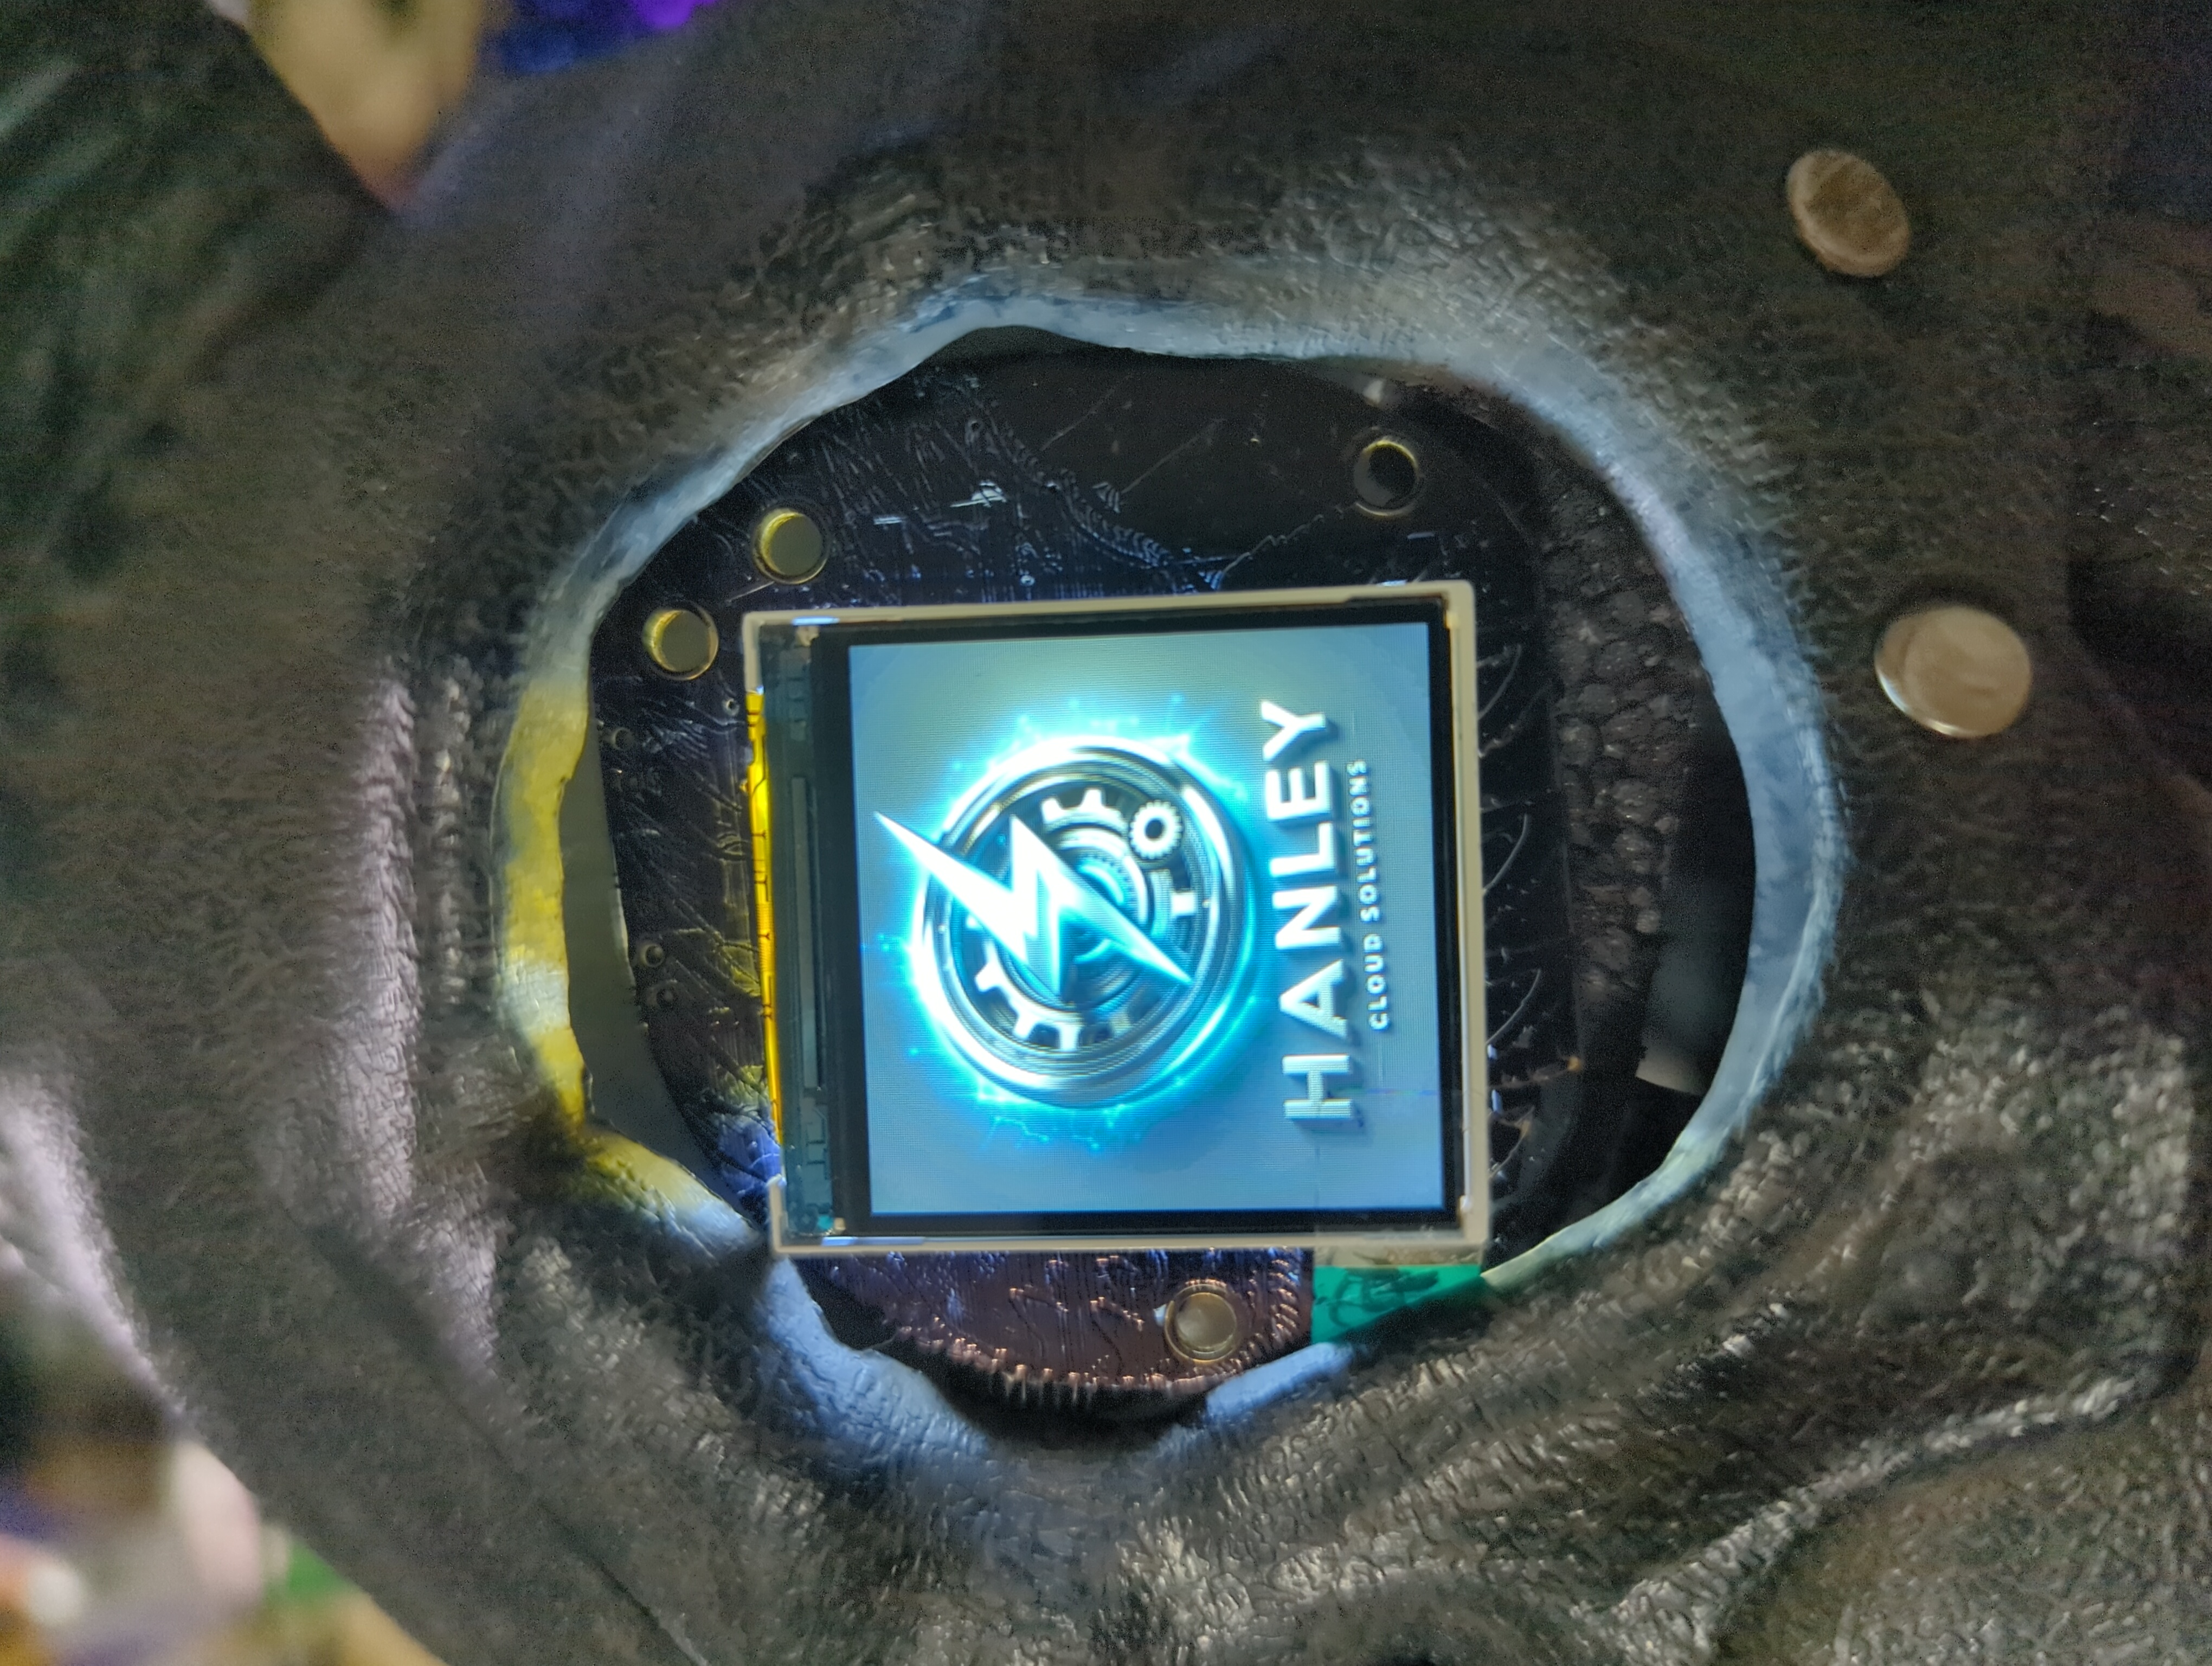
💡 FUN FACT –> you can change out the “splash.bmp” loading image with whatever you want and it will display on boot, as long as it’s 240x240…
Ian’s Insights:
It’s refreshing to take a break from the norm and dive into something fun, like creating cool projects for Halloween. I’m already thinking about plans for next year, like adding a voice modulator to the mask, or a motion sensor to the Raspberry Pi maybe… Making time for side projects like this helps keep me sharp when it’s time to get back to work. Just remember to gather your supplies early and make time to screw around.
In this Post We:
Part 1:
- 💾 Performed a Headless Raspberry Pi Setup (BullseyeOS).
- 🔌 Connected Hardware & Deployed Software Eyes.
- 👀 Customized Eye Shapes, Colours, Iris, Sclera, etc.
- 🎃 Lit up a Pumpkin!
Part 2:
- 🔩 Customized our Monster M4SK.
- 🔧 Extended the Distance Between Displays.
- 👻 Spooked the Neighbour’s Kids!
Thanks for Reading!
I hope this was a much fun reading as it was writing. Happy Halloween!

Helpful Links & Resources:
- Animated Eyes Bonnet for Raspberry Pi
- PiSugar S Plus Portable 5000 mAh UPS Lithium Battery Power Module
- Raspberry Pi 4 Model B
- Animated Snake Eyes Bonnet for Raspberry Pi
- Lithium Ion Cylindrical Battery - 3.7v 2200mAh
- JST SH 9-Pin Cable - 100mm long x 2
- Adafruit MONSTER M4SK - DIY Electronic Eyes Mask
- Separate the MONSTER M4SK
- Spruce Up a Costume with MONSTER M4SK Eyes and Voice

